Web interface
Every LAA serves an embedded web interface. It’s the third way to drive the
appliance, alongside laam on the command line
and the REST API from a script. All three talks to exactly
the same back end, so anything you change in one is immediately visible in the
others.
The web interface is the quickest way in: it needs nothing installed on your laptop, only a browser and the appliance IP address. It’s also the only place where some settings live, such as the network configuration and the API tokens.
Reaching it
Browse to the IP address printed on the OLED display,
for example http://192.168.0.145/.
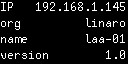
By default the web interface is served on the
public interface only. If the
appliance has no IP address yet, for insta,ce in a lab without DHCP, you can
reach it from the private DUT Eth port instead by pressing the
Soft Recovery button. Read the Connectivity
guide covers that path in full, including the 198.18.0.1 address to use.
First login
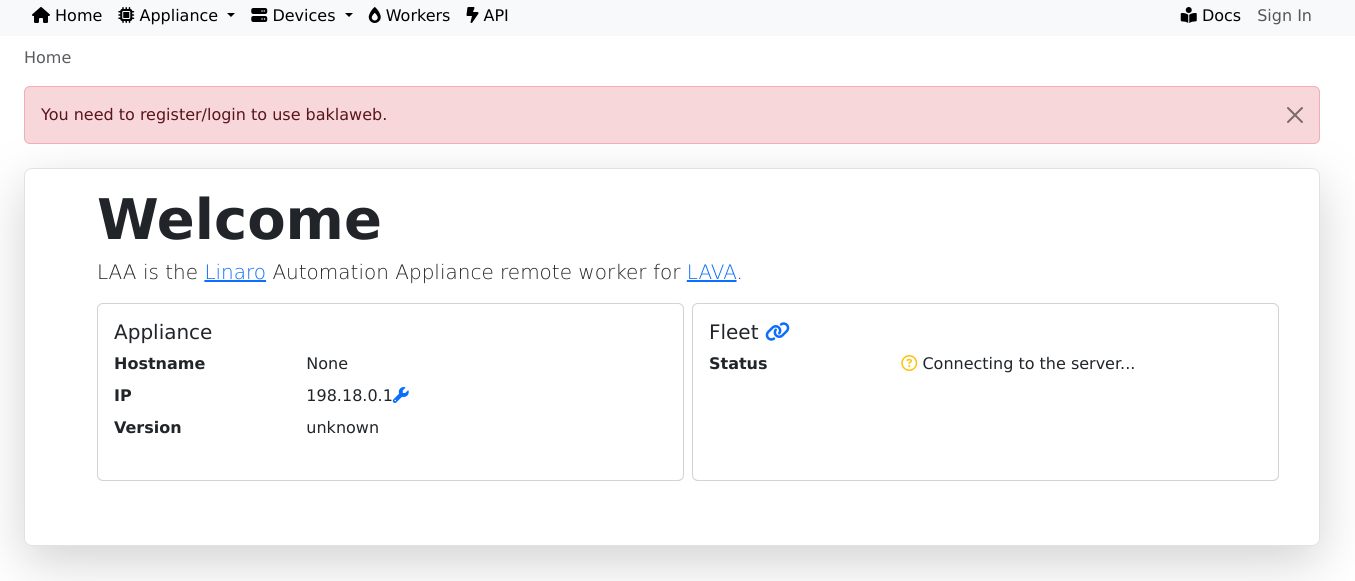
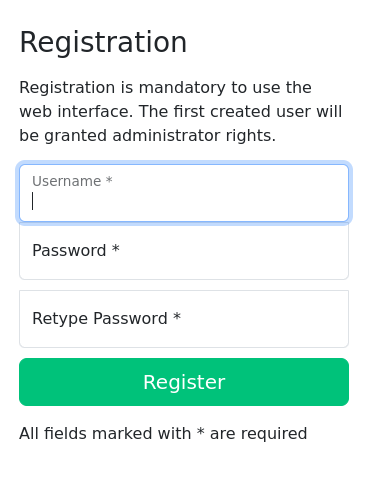
Registration is mandatory to use the web interface, and the first user created is granted administrator rights: create it as soon as the appliance is on the network, before anyone else can.
Home
The landing page answers the two questions you usually have first: is this the right appliance, and is it talking to the cloud.
The Appliance card shows the hostname, IP address, current time, the running
version and the version it would upgrade to. The Fleet card shows the
fleet management instance, the connection status, the
appliance serial number and the owning organization. This is where you look
when an appliance isn’t appearing in the fleet management service.
Switching fleet instance
The Instance configuration card can switch the appliance between the
production and development fleet instances. This is intended for Linaro
engineering; don’t use it unless Linaro support asks you to.
Appliance
System
Appliance > System is the appliance’s own health page: CPU, memory and swap
usage, and the filling of each mountpoint (/, /boot, /usr, /var,
/sysroot). The Graphs and Details buttons switch between a plotted
history and the raw numbers.
Services
Appliance > Services lists the systemd services that make up the appliance,
each with its current status and a link to its logs. It covers both the
appliance’s own stack (baklaweb, baklaweb-bakfleet, baklaweb-webtelnet)
and the services offered to the DUT: dnsmasq, ser2net, nfs-server,
tftpd-hpa.socket and chronyd, described in
DUT services.
This is the page to open when something isn’t answering: it’s the same
information as laam services, without
needing a token.
Network
Appliance > Network has four tabs. The first three are read-only views of the
current state: the quickest way to confirm what the appliance actually got
from DHCP:
Tab |
Columns |
|---|---|
|
Interface, IP, Flags |
|
Interface, Type, Status, MAC |
|
Interface, From, To, Type, Scope, Protocol |
The interfaces are named public and private, matching the two
Ethernet ports.
The Settings tab is where you configure the appliance networking.
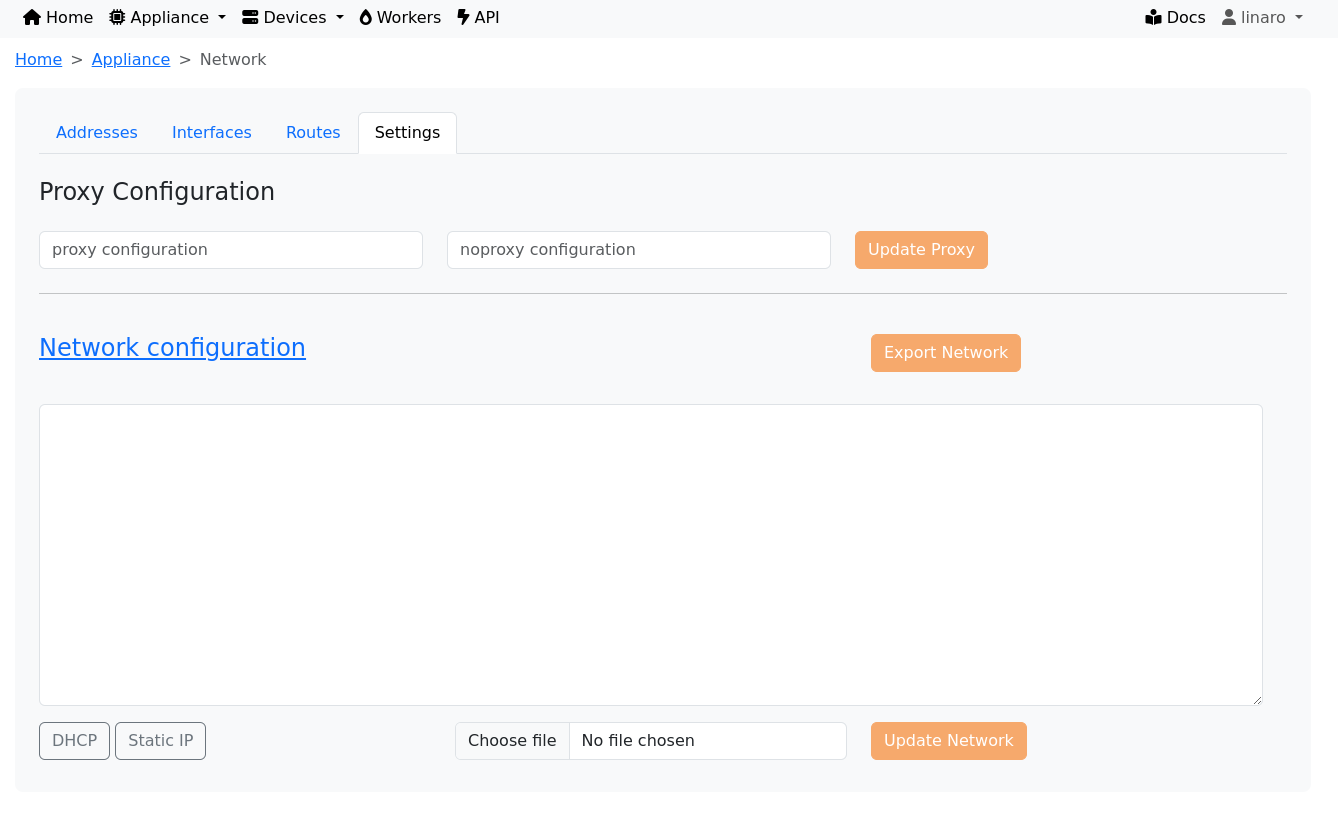
Proxy configuration:the proxy and no-proxy values used for outbound connections. Needed when the lab reaches the internet through an HTTP proxy; see Cloud connectivity.
Network configuration: a free-form text area using
systemd-networkd syntax.
The DHCP and Static IP buttons only fill the text area with a starting
template, so you can edit before saving.
Export Network downloads the current configuration and the file picker loads
one from disk: useful for applying an identical configuration across several
appliances.
You can lock yourself out
A bad network configuration can make the appliance unreachable on the public
interface. Recovery is the same Soft Recovery path used when there is no
DHCP: see Without DHCP.
Root CAs
Appliance > Root CAs manages the custom root certificate authorities trusted
by the appliance. Each entry is listed with its SHA-256 fingerprint and its
issue and expiry dates.

This is what an appliance needs in a lab whose firewall performs SSL interception. In such a lab the firewall terminates the appliance’s outbound HTTPS connections and re-signs them with its own CA; unless that CA is trusted, the appliance can’t reach the fleet management service and will never finish registering.
To add one, click Add CA, select your organisation’s root CA certificate file
and confirm. The certificate appears in the list and is trusted immediately.
The bin icon on a row removes it again.
Administrator only
Add CA and the delete control are only shown to accounts with administrator
rights. A regular user sees the list but can’t change it.
Ask your IT department for the root CA used by the intercepting proxy: it’s the same certificate they deploy to managed laptops.
The procedure is described in the connectivity guide.
SSH Keys
Appliance > SSH Keys lists the keys authorised to open an SSH session on the
appliance, and lets you upload or delete them. It’s documented in full,
including how to generate a key and how to connect, on the SSH
keys page.
Logs and Time
Appliance > Logs shows the appliance system log, and Appliance > Time the
time and time zone configuration.
Devices
The Devices menu is a read-only inventory of what the appliance can see:
Page |
Columns |
|---|---|
|
Name, Target |
|
Name, Path, Port, Speed, View |
|
Bus, Device, Id, Tag, Details |
|
The udev rules applied on the appliance |
Serials is the most useful of the four: it’s the live version of the
ser2net configuration
table, showing each console name, the device it maps to, the TCP port it’s
published on and its line settings. Use it to find the name to pass to
laam serials connect.
Serial console in the browser
The View column on the Serials page opens a full terminal on that console,
inside the browser. This is the quickest possible route to a DUT console: no
laam, no SSH client, no API token—just a browser and the appliance address.
Each row links to its own terminal, so pick the console and the baud rate you
want: ttymxc3 is the 115200 entry for SIB_UART4, ttymxc3-9600 the same
port at 9600, etc..
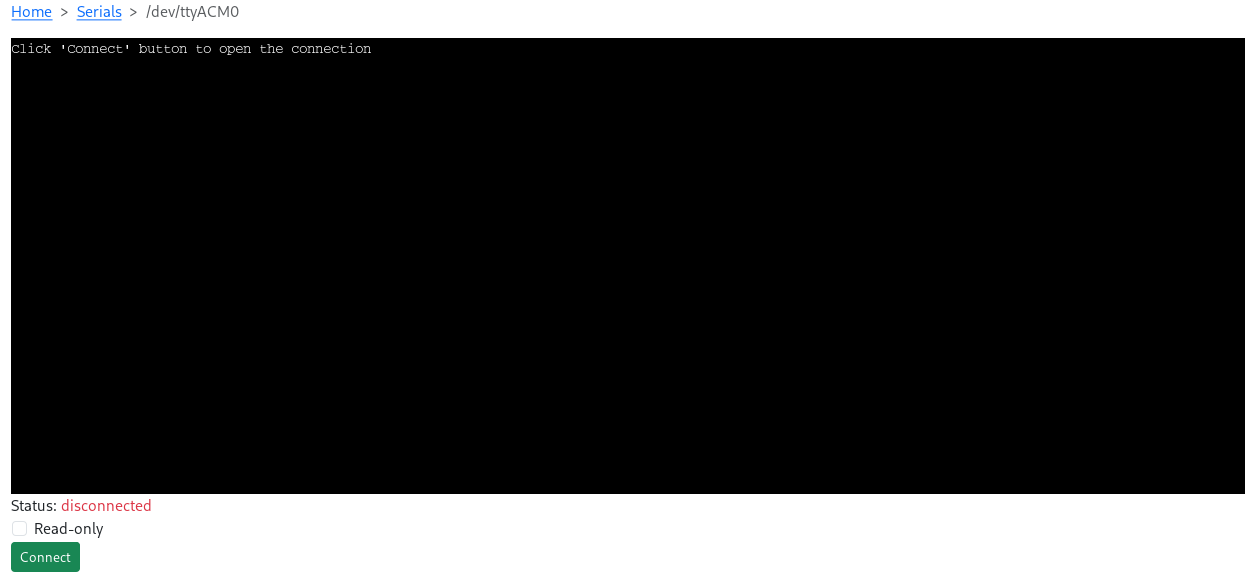
The terminal fills the page, with three controls underneath:
a
Statusindicator, showingdisconnecteduntil you attacha
Read-onlytogglea
Connectbutton, which attaches the terminal to the console
Set Read-only first if you want it, then click Connect. Once connected the
terminal behaves like any other: you can interrupt the bootloader, log in and
run commands.
Use read-only to watch
Enable Read-only before connecting when you only want to observe: following
a boot, or watching what an automated job is doing.
Keystrokes aren’t sent to the DUT, so there is no risk of interrupting a
bootloader countdown by accident.
The terminal is served by the baklaweb-webtelnet service, which you can check
on the Services page if a console fails to attach.
DUT
The DUT page is where you watch what the board is doing and change its
hardware state. It’s the web equivalent of laacli,
and the one page most people use daily.
Watching power and temperature
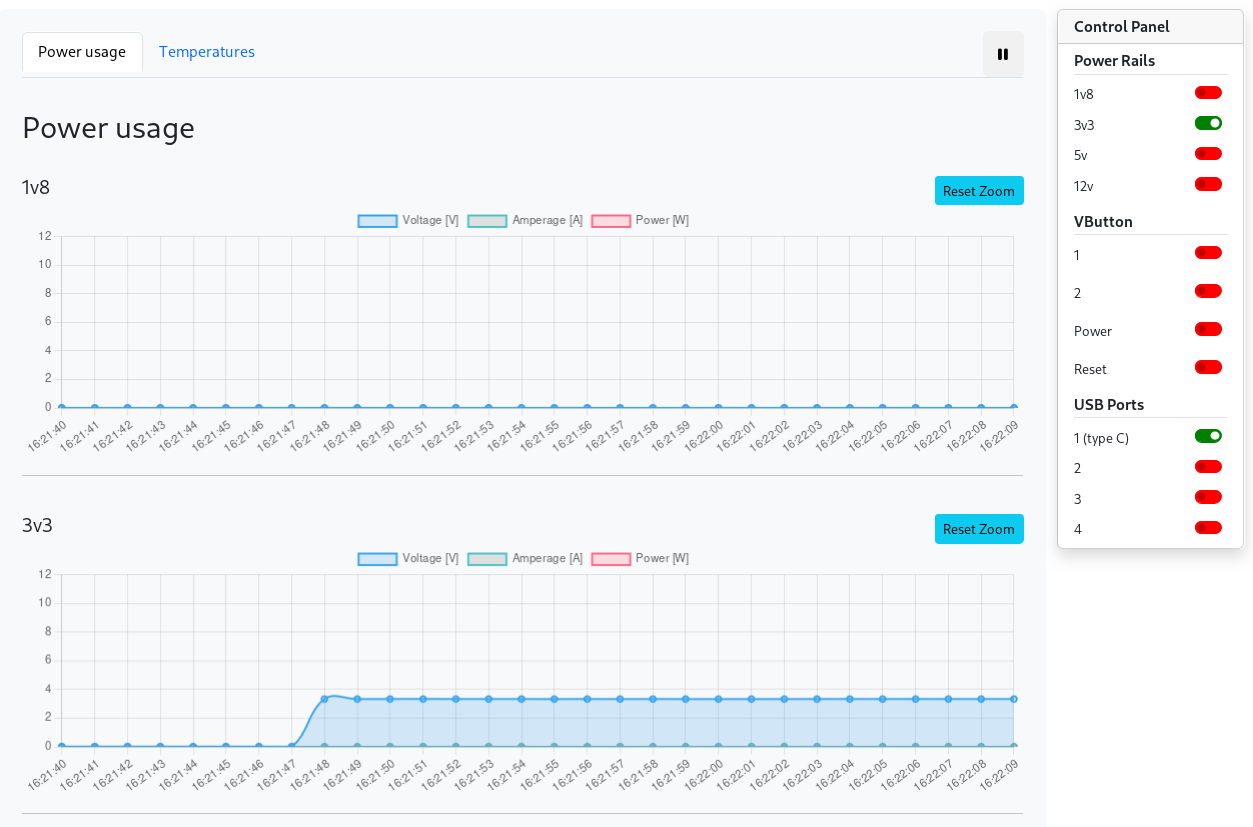
The left of the page plots the DUT’s behaviour over time, under two tabs:
Power usage: one chart per power rail,1v8,3v3,5vand12v. Each chart plots three series:Voltage [V],Amperage [A]andPower [W], so you can see both what the rail is delivering and what the DUT is drawing from it.Temperatures: the thermal probe readings
The charts update live. The pause button at the top right stops them, which
is what you want before reading off a value or zooming in. Each chart can be
zoomed into a time range, with Reset Zoom to go back to the full history.
These graphs answer questions that are awkward to get at any other way: whether a board is drawing current at all, whether it browned out part-way through a boot, whether a test load is overheating it, or how much a given workload actually costs in power.
Changing power rails and USB ports
The Control Panel down the right side exposes the hardware controls as
toggles: green for On and red for Off
Group |
Toggles |
Equivalent command |
|---|---|---|
|
|
|
|
|
|
|
|
Toggling a power rail switches it On or Off; the effect shows up on the
Power usage chart above within a few seconds, which makes this the easiest
way to confirm a board is really powered.
The VButton toggles press the virtual buttons: Reset and Power on most
boards, with 1 and 2 wired per-MIB.
The USB Ports toggles cut and restore power to each DUT USB
port individually.
Combined with the serial console, this is enough to power a board, interrupt its bootloader and watch it boot without installing anything at all.
A running job owns the DUT
These toggles act on the hardware immediately. If a LAVA job or a CI pipeline is using the DUT, cutting a rail or a USB port will break it. Check Workers before touching the control panel on an appliance that’s part of a CI setup.
Workers
Workers lists the LAVA workers running on the appliance, with the worker ID,
its name, the LAVA instance it’s attached to (linking straight to the worker
page on the LAVA server) whether it’s running, its live connection status,
and its logs.
The same content is available from laam workers.
Workers are configured from LMS, not here: see LAVA integration.
API
The API entry opens the OpenAPI specification for the appliance, browsable in
place at /api/v1/docs. It’s generated by the appliance itself, so it always
matches the installed version. See LAA REST API.
Your profile
The user menu on the right of the navigation bar opens your profile page.
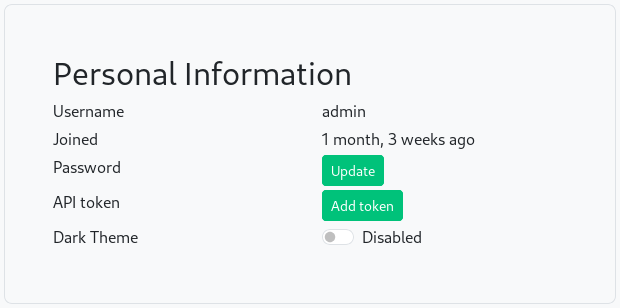
It shows your username, when the account was created and the groups you belong to, and lets you:
Updateyour passwordAdd token: create the API token used bylaamand by any script calling the REST API. This is the normal way to bootstraplaam; the procedure is detailed in Authentication.toggle
Dark Theme
Version details
The appliance version in the page footer links to a detail page with three
tabs: Versions (kernel release, hardware vendor, model and U-Boot firmware
version), Layers and Manifest (the Yocto build configuration and layer
revisions). Quote this page when reporting a problem to
support.
Web interface or laam?
Web interface |
||
|---|---|---|
Needs installing |
No, just a browser |
Yes, a Python package |
Good for |
One-off actions, first setup, checking state |
Repeated actions, scripting, several appliances |
Network and proxy configuration |
Yes |
Read-only |
Serial console |
Read the list |
Connect to it |
Scriptable |
No |
Yes, and from Python |
Works before a token exists |
Yes |
No, the token is created in the web interface |
Web interface compared to laam
In practice most people use both: the web interface to bring the appliance up
and create the token, then laam for day-to-day work. Both are covered from
the workflow angle in Developing on a DUT.