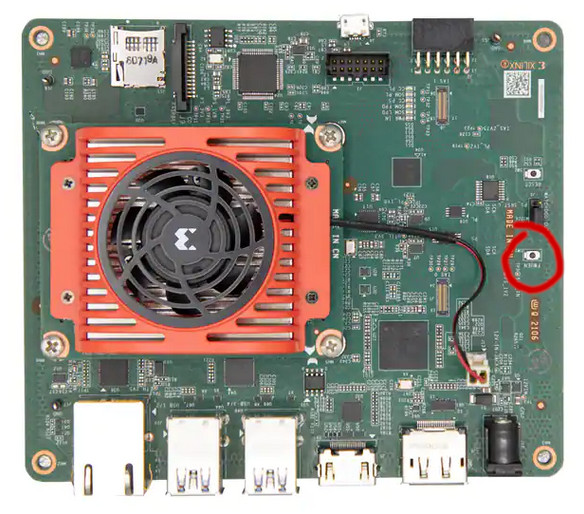
kv260
Enablement
LAVA by default is configured to work with this DUT + LAA setup. If you opt for a different setup you’ll have to change your DUT + LAA device configuration on LAVA.
The KV260 DUT can be automated using the kv260 boards MIB.
Components
The following components are required to fully automate the board:
Short RJ45 network cable
USB-A male to MicroUSB male cable
Micro SD Card
2.5/5.5mm barrel jack to MIB 2-pin connector, wired centre positive
NF-A4x10 FLX Premium Fan
Fan heatsink
Software
In order for the kv260 DUT to be easily testable by LAVA please refer to this repo:
https://github.com/wmamills/xilinx-lab-stuff
Hardware modification
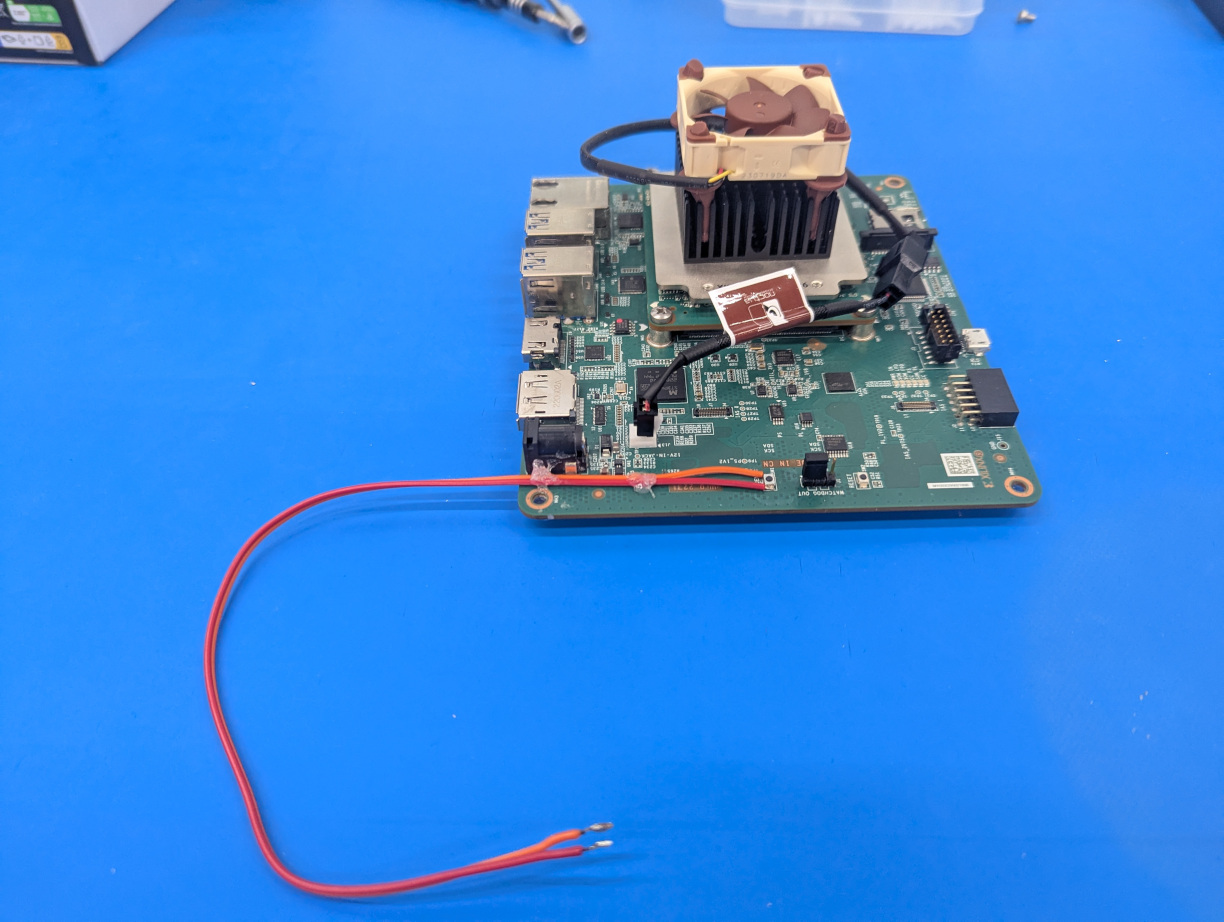
In order to automate recovery, the DUT hardware should be modified.
Hardware modification
The DUT will not be automatizable without this modification.
Fan and Heatsink
We suggest this fan.
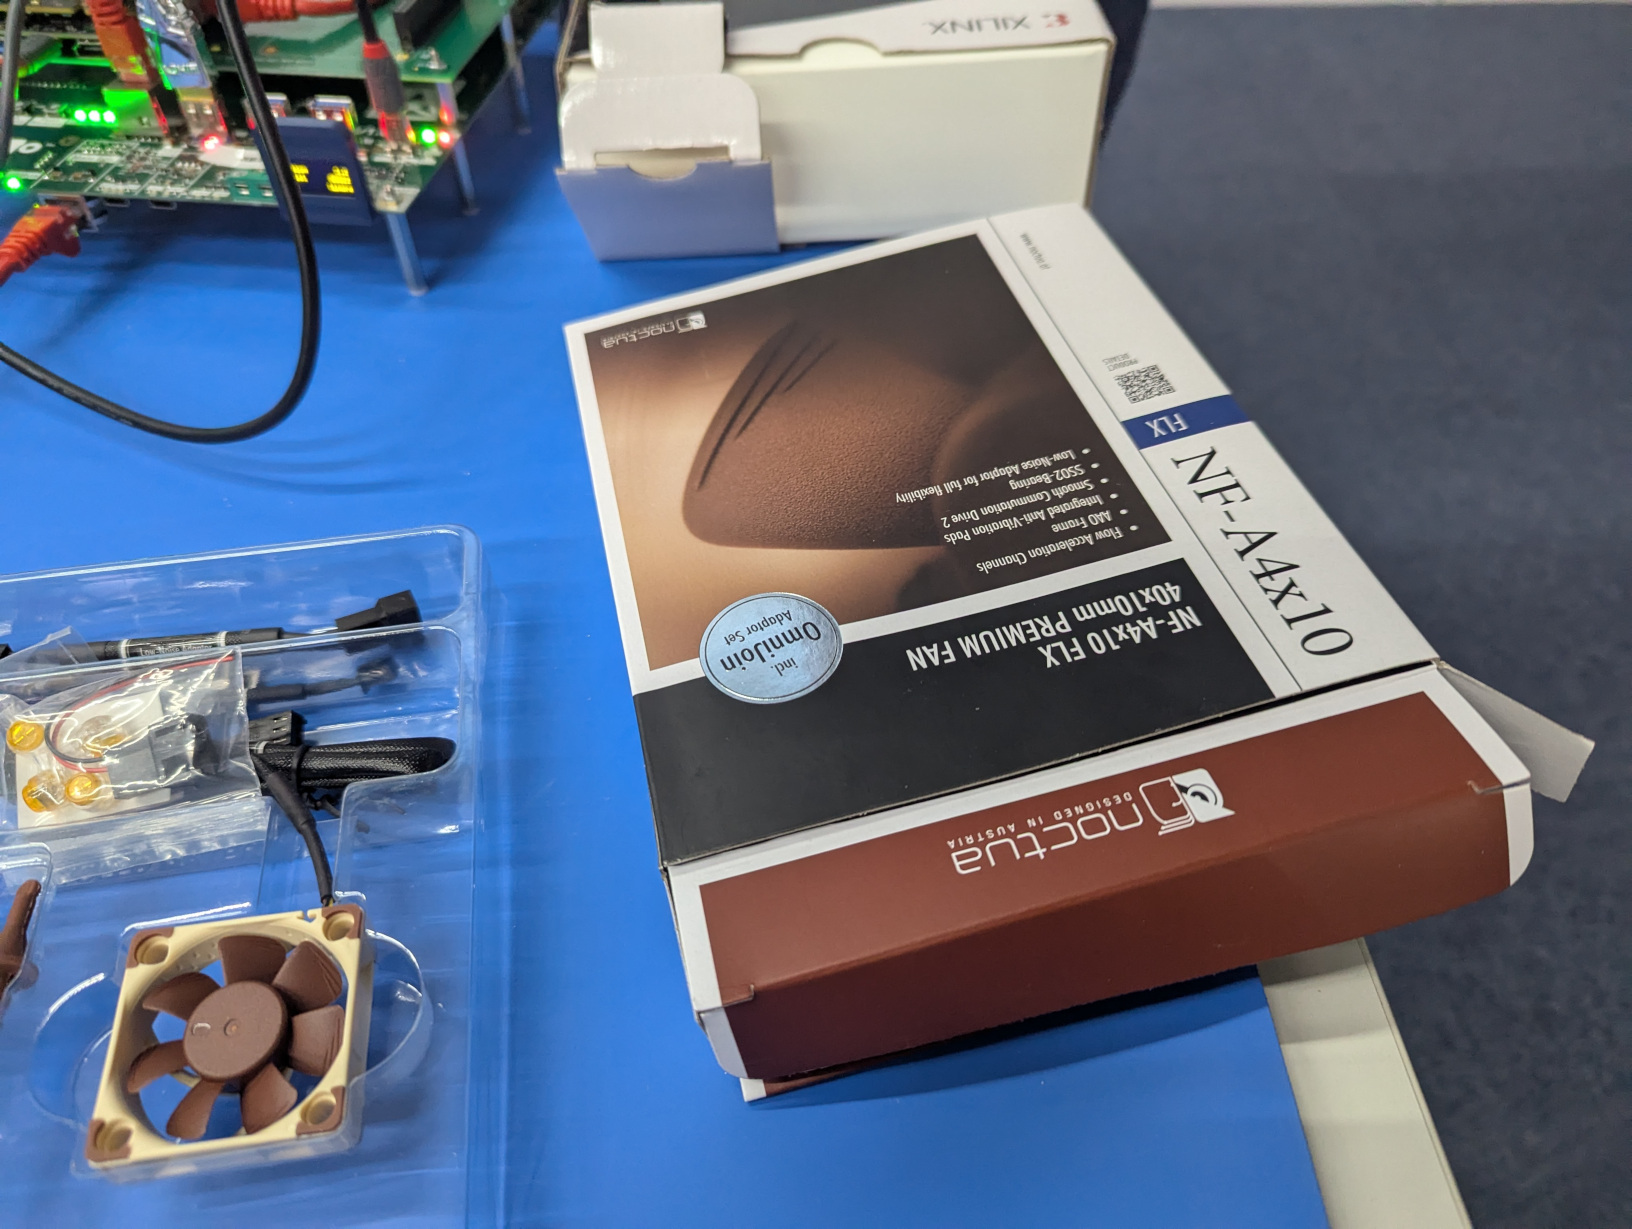
NF-A4x10 FLX Premium Fan
Connect it to the kv260 with the “3:2-pin Adaptor NA-AC2” as shown.
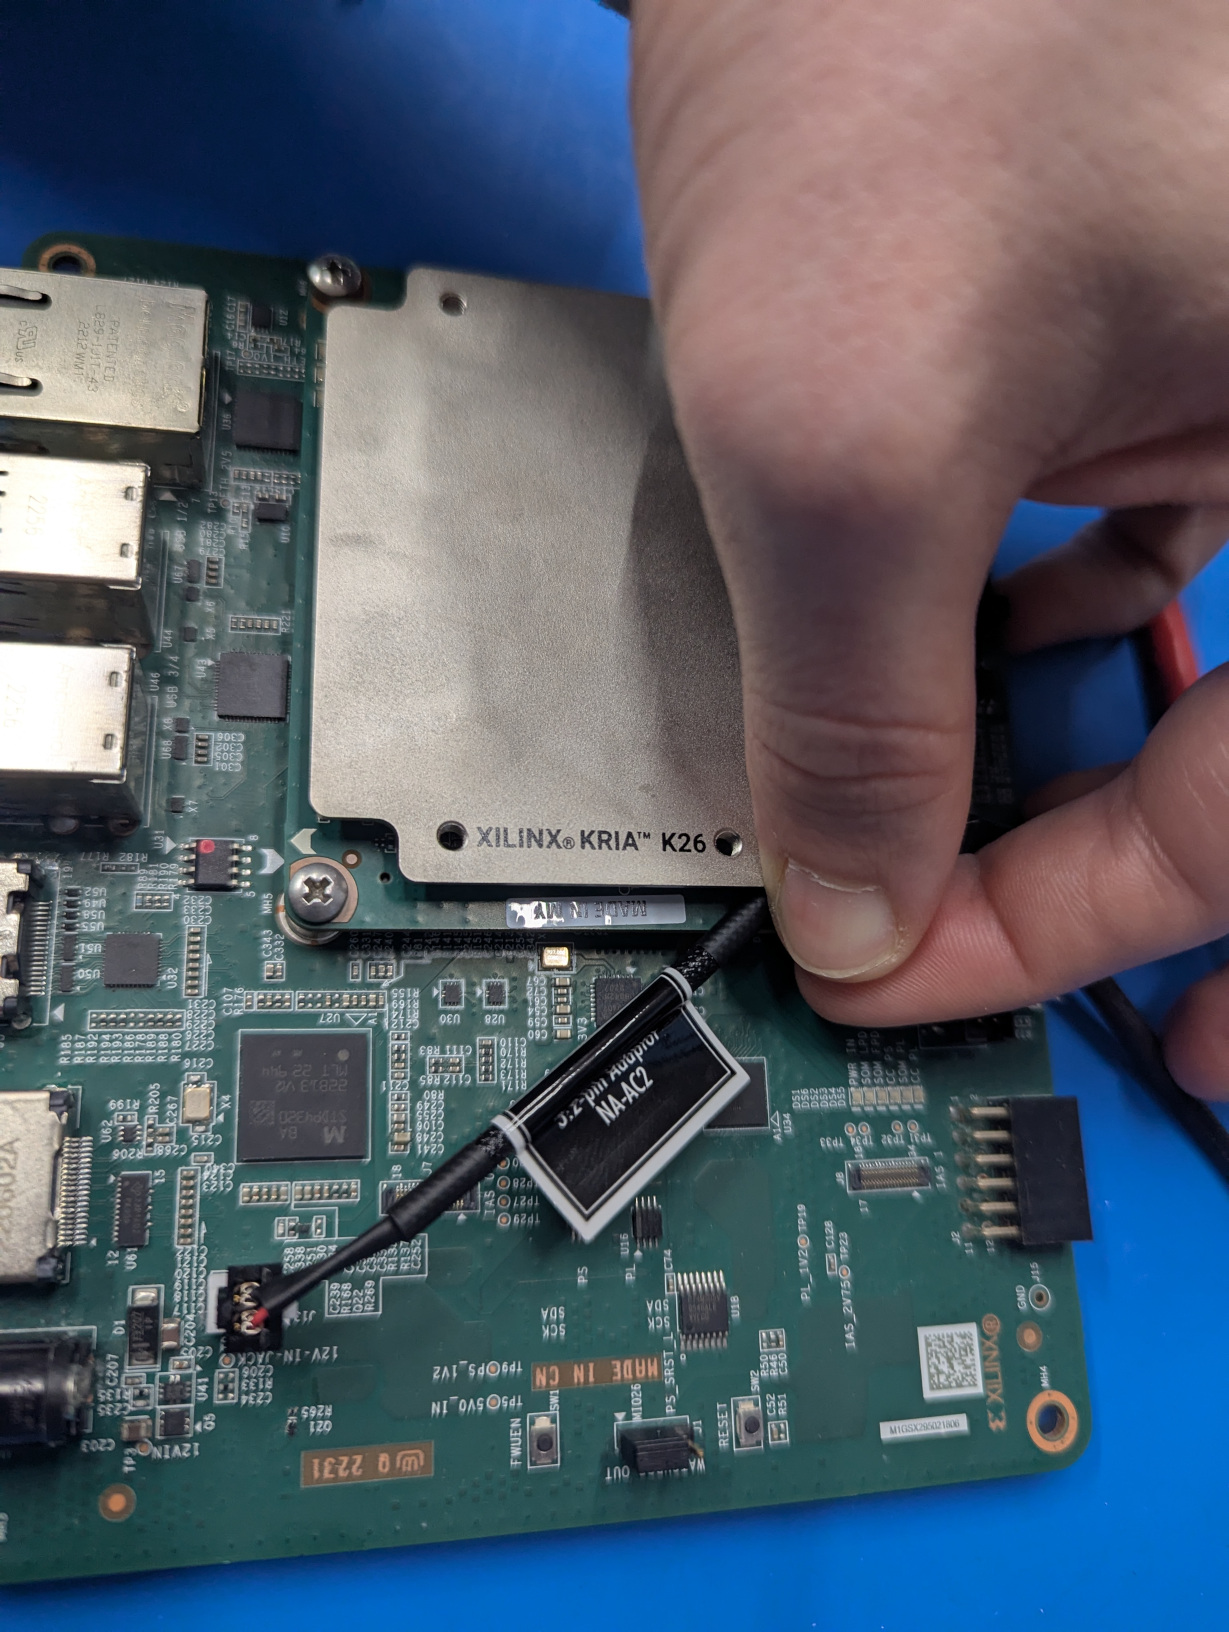
Connect the fan
MIB
The following picture shows how to connect the KV260 board to the MIB.
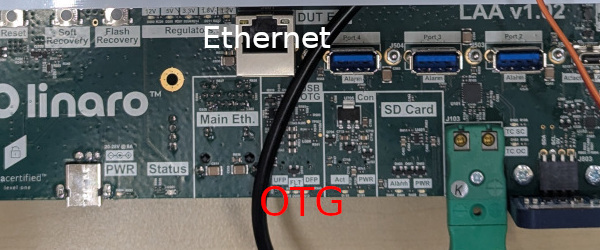
LAA Connections
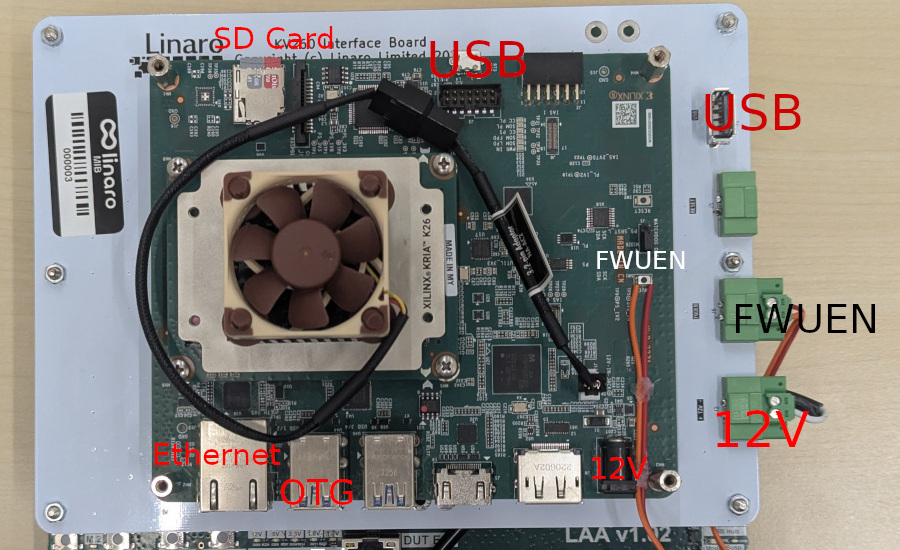
DUT Connections
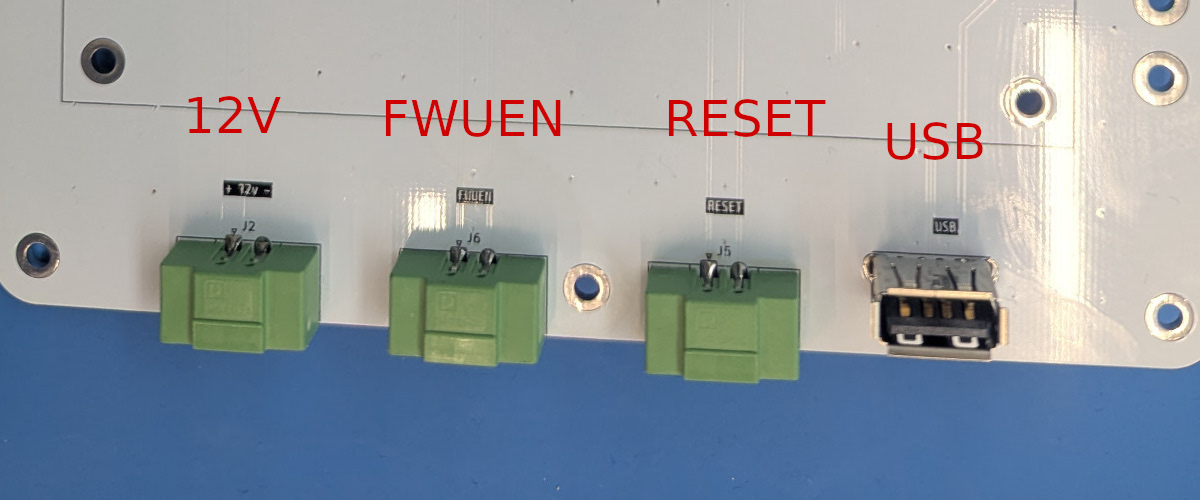
MIB Connections
Recovery
Connect the recovery wires cable to the KV260 MIB header labeled FWUEN as indicated above.
Network
Connect the kv260 network interface to the LAA private network interface as indicated above.
Power
The kv260 gets power from the 2.5/5.5mm barrel jack connected to the board and the 12V header on the MIB.
Serial
Connect a USB cable from the carrier board MicroUSB port to USB on the MIB as shown above.
USB
Connect the LAA USB OTG port (front facing) to the kv260 USB-A socket shown in the picture above.
SD Card
Please take an SD Card of at least 16Gb and format it. Then insert it in the SD card slot on the kv260 board.
