Raspberry Pi 3 and 4
Enablement
LAVA by default is configured to work with this DUT + LAA setup. If you opt for a different setup you’ll have to change your DUT + LAA device configuration on LAVA.
The Raspberry Pi MIB is compatible with the following DUT:
Raspberry Pi 3B: bcm2837-rpi-3-b
Raspberry Pi 4B: bcm2711-rpi-4-b
Components
The following components are required to fully automate the board:
Short RJ45 network cable
USB-A male to USB-C male cable
Micro SD Card
MIB
Configuration
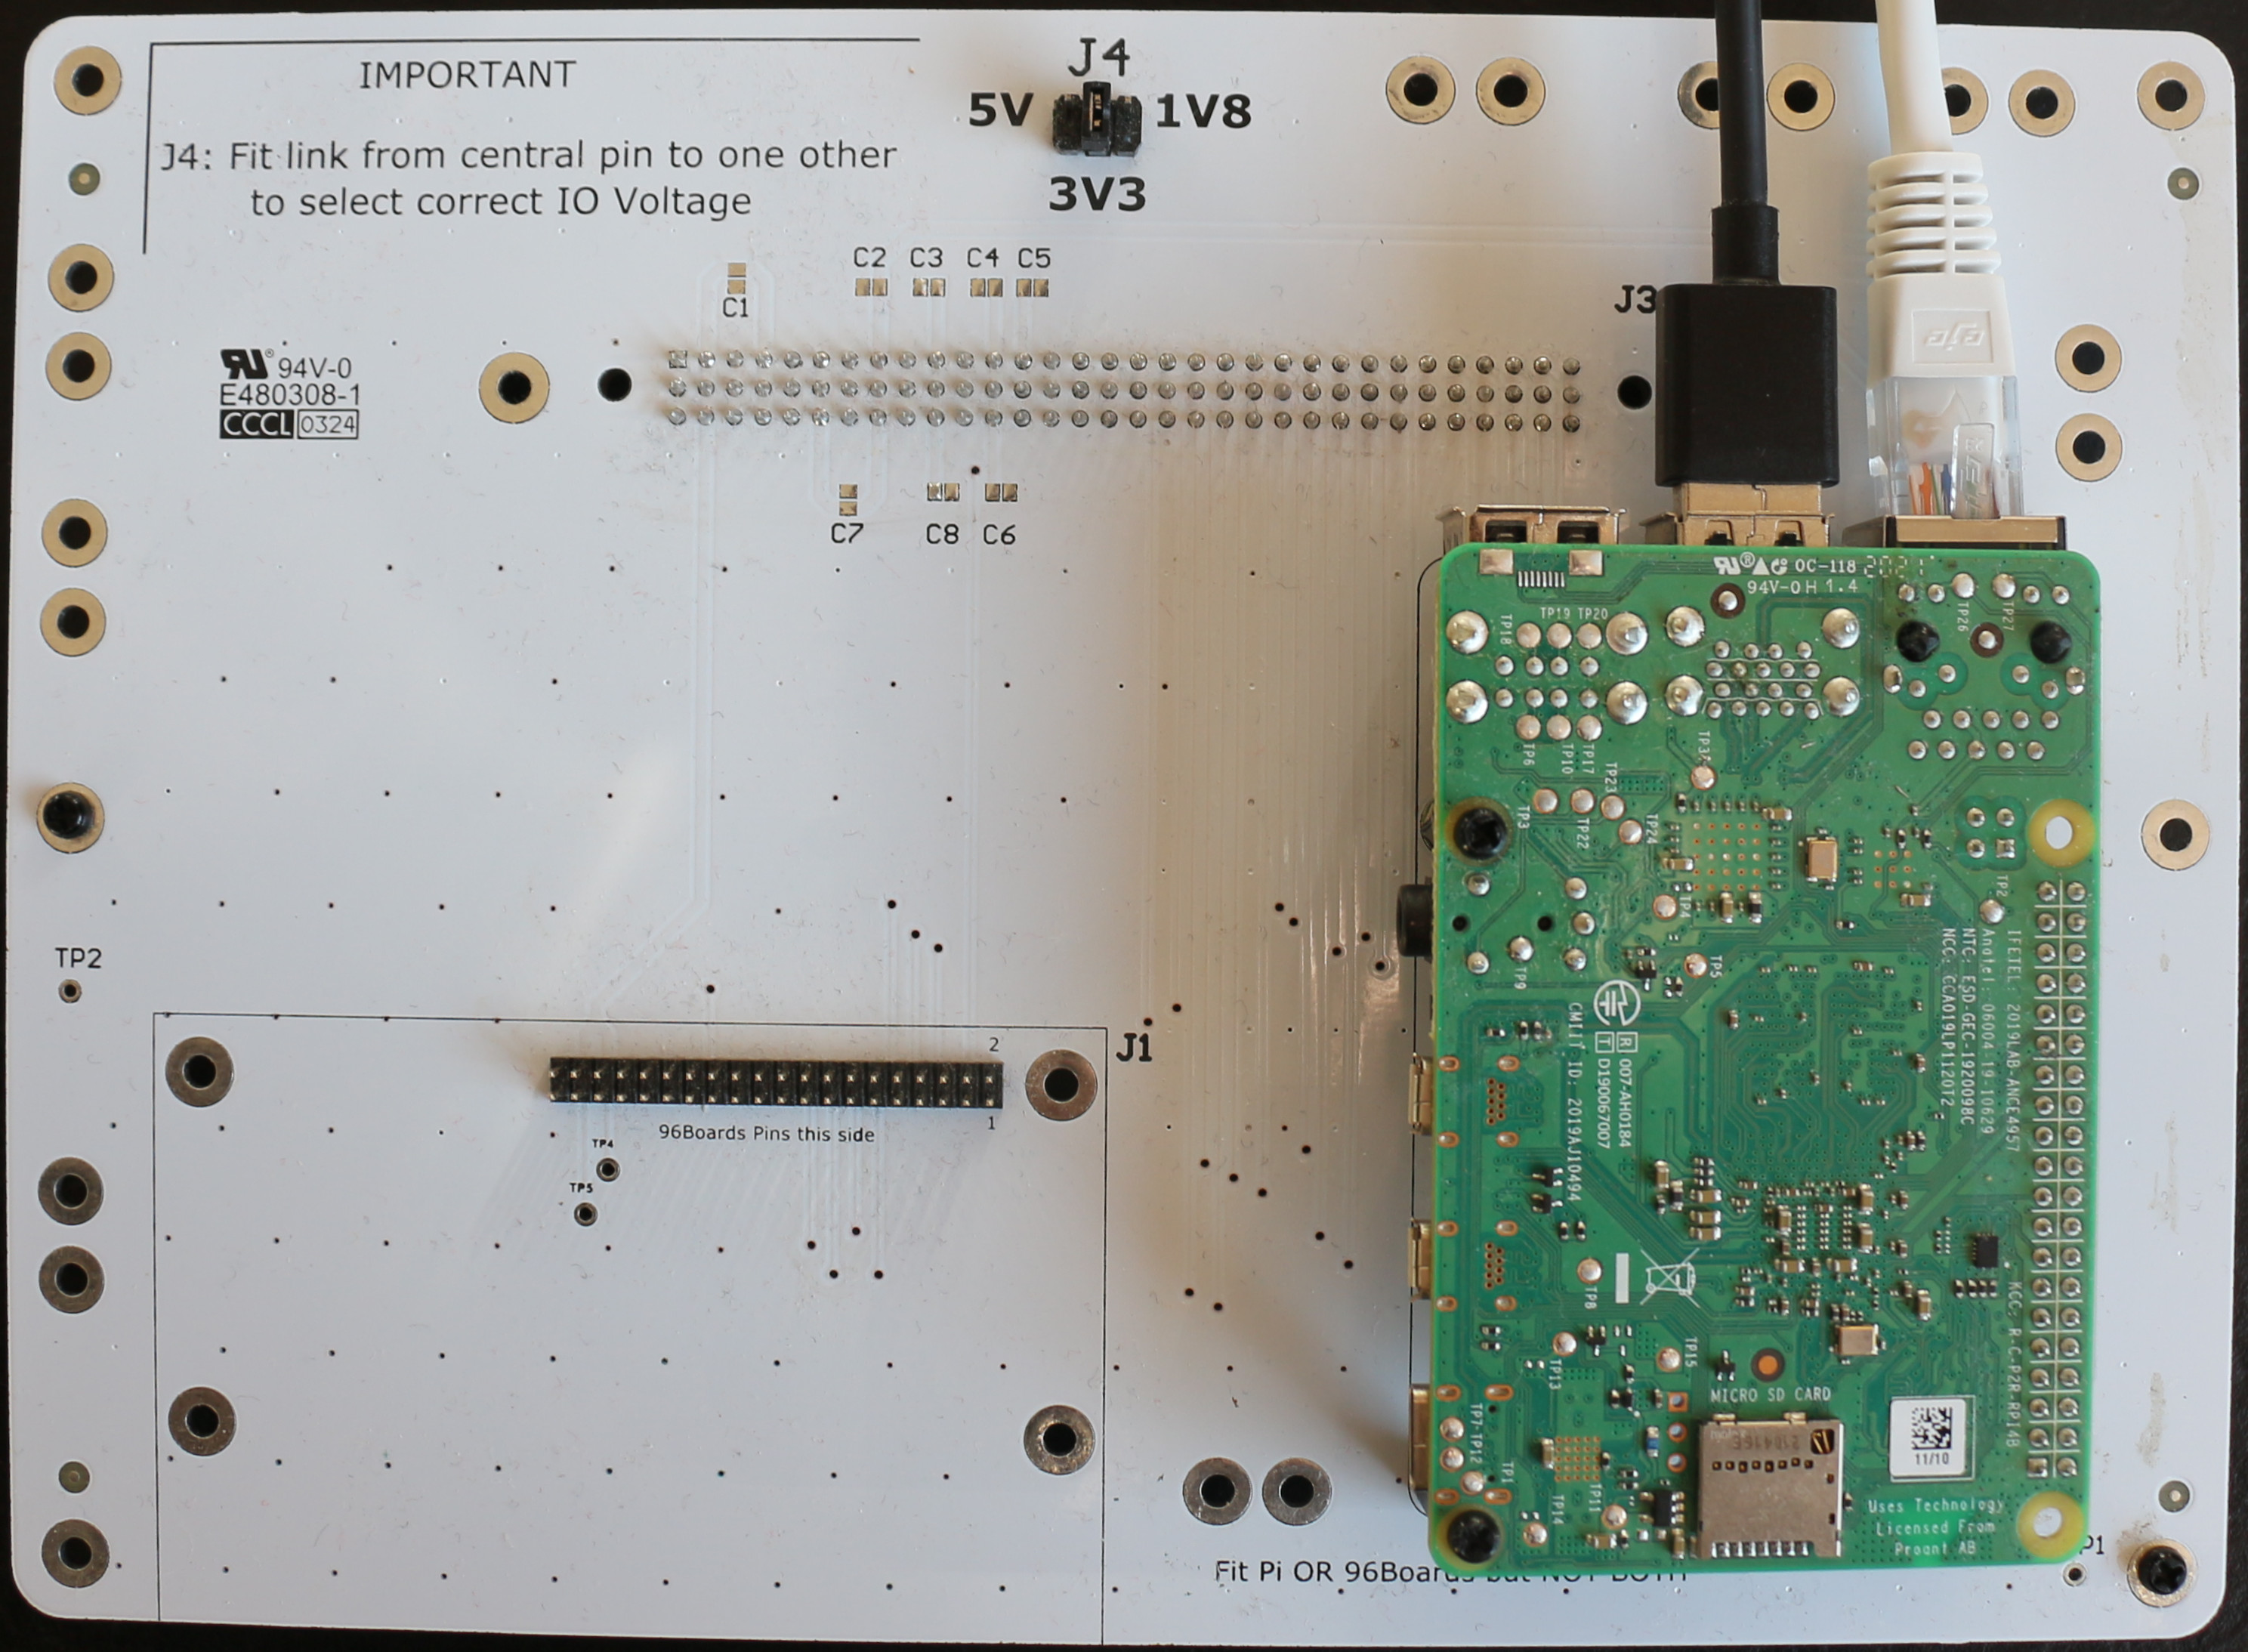
Set the voltage level switch on the top of the MIB to 3v3:
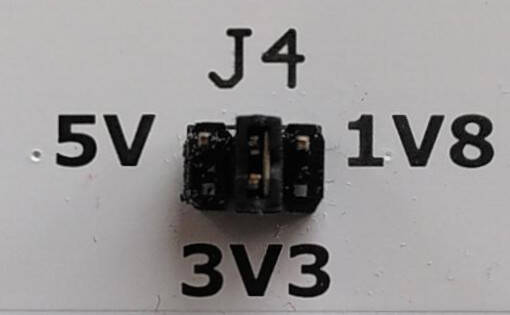
VIO level set to 3v3
RPi header
Multiple DUTs
Only connect a Raspberry Pi or a 96 board on the MIB, not both at the same time!
Connect the Raspberry Pi socket to the MIB socket. The Raspberry Pi should fit in the printed rectangle.
RPi 4 booting from USB mass storage
Standoffs
You can use standoffs to securely attach the Raspberry Pi to the MIB.
Network
Connect the Raspberry Pi network interface to the SIB private network interface.
USB
Connect the LAA USB OTG port (front facing) to one of the Raspberry-Pi USB port.
Software
In order for the Raspberry Pi DUT to be easily testable by LAVA, the DUT should boot to u-boot.
By default, a Raspberry Pi will boot from the SDCard and fallback to USB Mass Storage. You have then two options to boot from:
USB Mass Storage Emulation: more flexible and with less setup
SDCard: old-school but reliable
USB Mass Storage Emulation
We recommend to use USB Mass Storage Emulation to provision the DUT. The LAA USB OTG port will act as a USB Mass Storage device with the content that you specify in LAVA.
This setup allows to update the bootloader without reflashing the DUT.
We provide pre-built images with u-boot:
SDCard
Format the SDCard to have one partition of type VFAT
If the SDCard is available at /dev/sdb, you can automatically create the
partition with fdisk:
echo "n\n\n\n\n\nt\nc\nw\n" | sudo fdisk /dev/sdb
The content to extract in the partition is DUT specific:
Setup a simple recovery mechanism
Independent of your preferred boot method, you might want to configure the Pi to always first attempt to boot via USB. By default the PI will try to boot over SD-card first and will only fallback to USB in case of failure. This could potentially brick your device (e.g. you installed a broken bootloader on the SD-card). If you setup the Pi to first try to boot over USB, you will always be able to recover the device via USB Mass Storage Emulation. You will still be able to boot from SD-card, if you have flashed a functioning image to the card and do not provide any image via USB.
Does not work on RPi 3
The boot process differs between RPi 3 and 4. The setup below only applies to the RPi 4 and newer. For the boot process of the RPi 3, please refer to the official documentation.
The RPi 4 is using an EEPPROM to configure the boot flow. You can find the detailed boot process here. The most simple way to configure USB boot, is to flash the specialized EEPROM updater image to an SD-card. You can use the Pi Imager update tool to flash this image. You will find it in the OS selection under MISC. Alternatively you will find this image in github. Choose the USB variant. Booting an SD-card with this image, will:
Update the second stage bootloader in the EEPROM to the newest version
Change the boot order to first boot over USB and only try the SD-card second
After the EEPROM flashing is finished, delete the content of the SD card. (Otherwise, the PI will continue to try to update the EEPROM)
If you managed to brick your device regardless (e.g. by breaking the EEPROM), you can also try to talk with the Pi in USB device mode. But this setup is more complicated.