Raspberry Pi 5
Enablement
LAVA by default is configured to work with this DUT + LAA setup. If you opt for a different setup you’ll have to change your DUT + LAA device configuration on LAVA.
Components
The following components are required to fully automate the board:
Short RJ45 network cable
JST PH 3pin to female socket cab
USB-A male to USB-C male cable
USB-C male to USB-C male cable
Micro SD Card
MIB
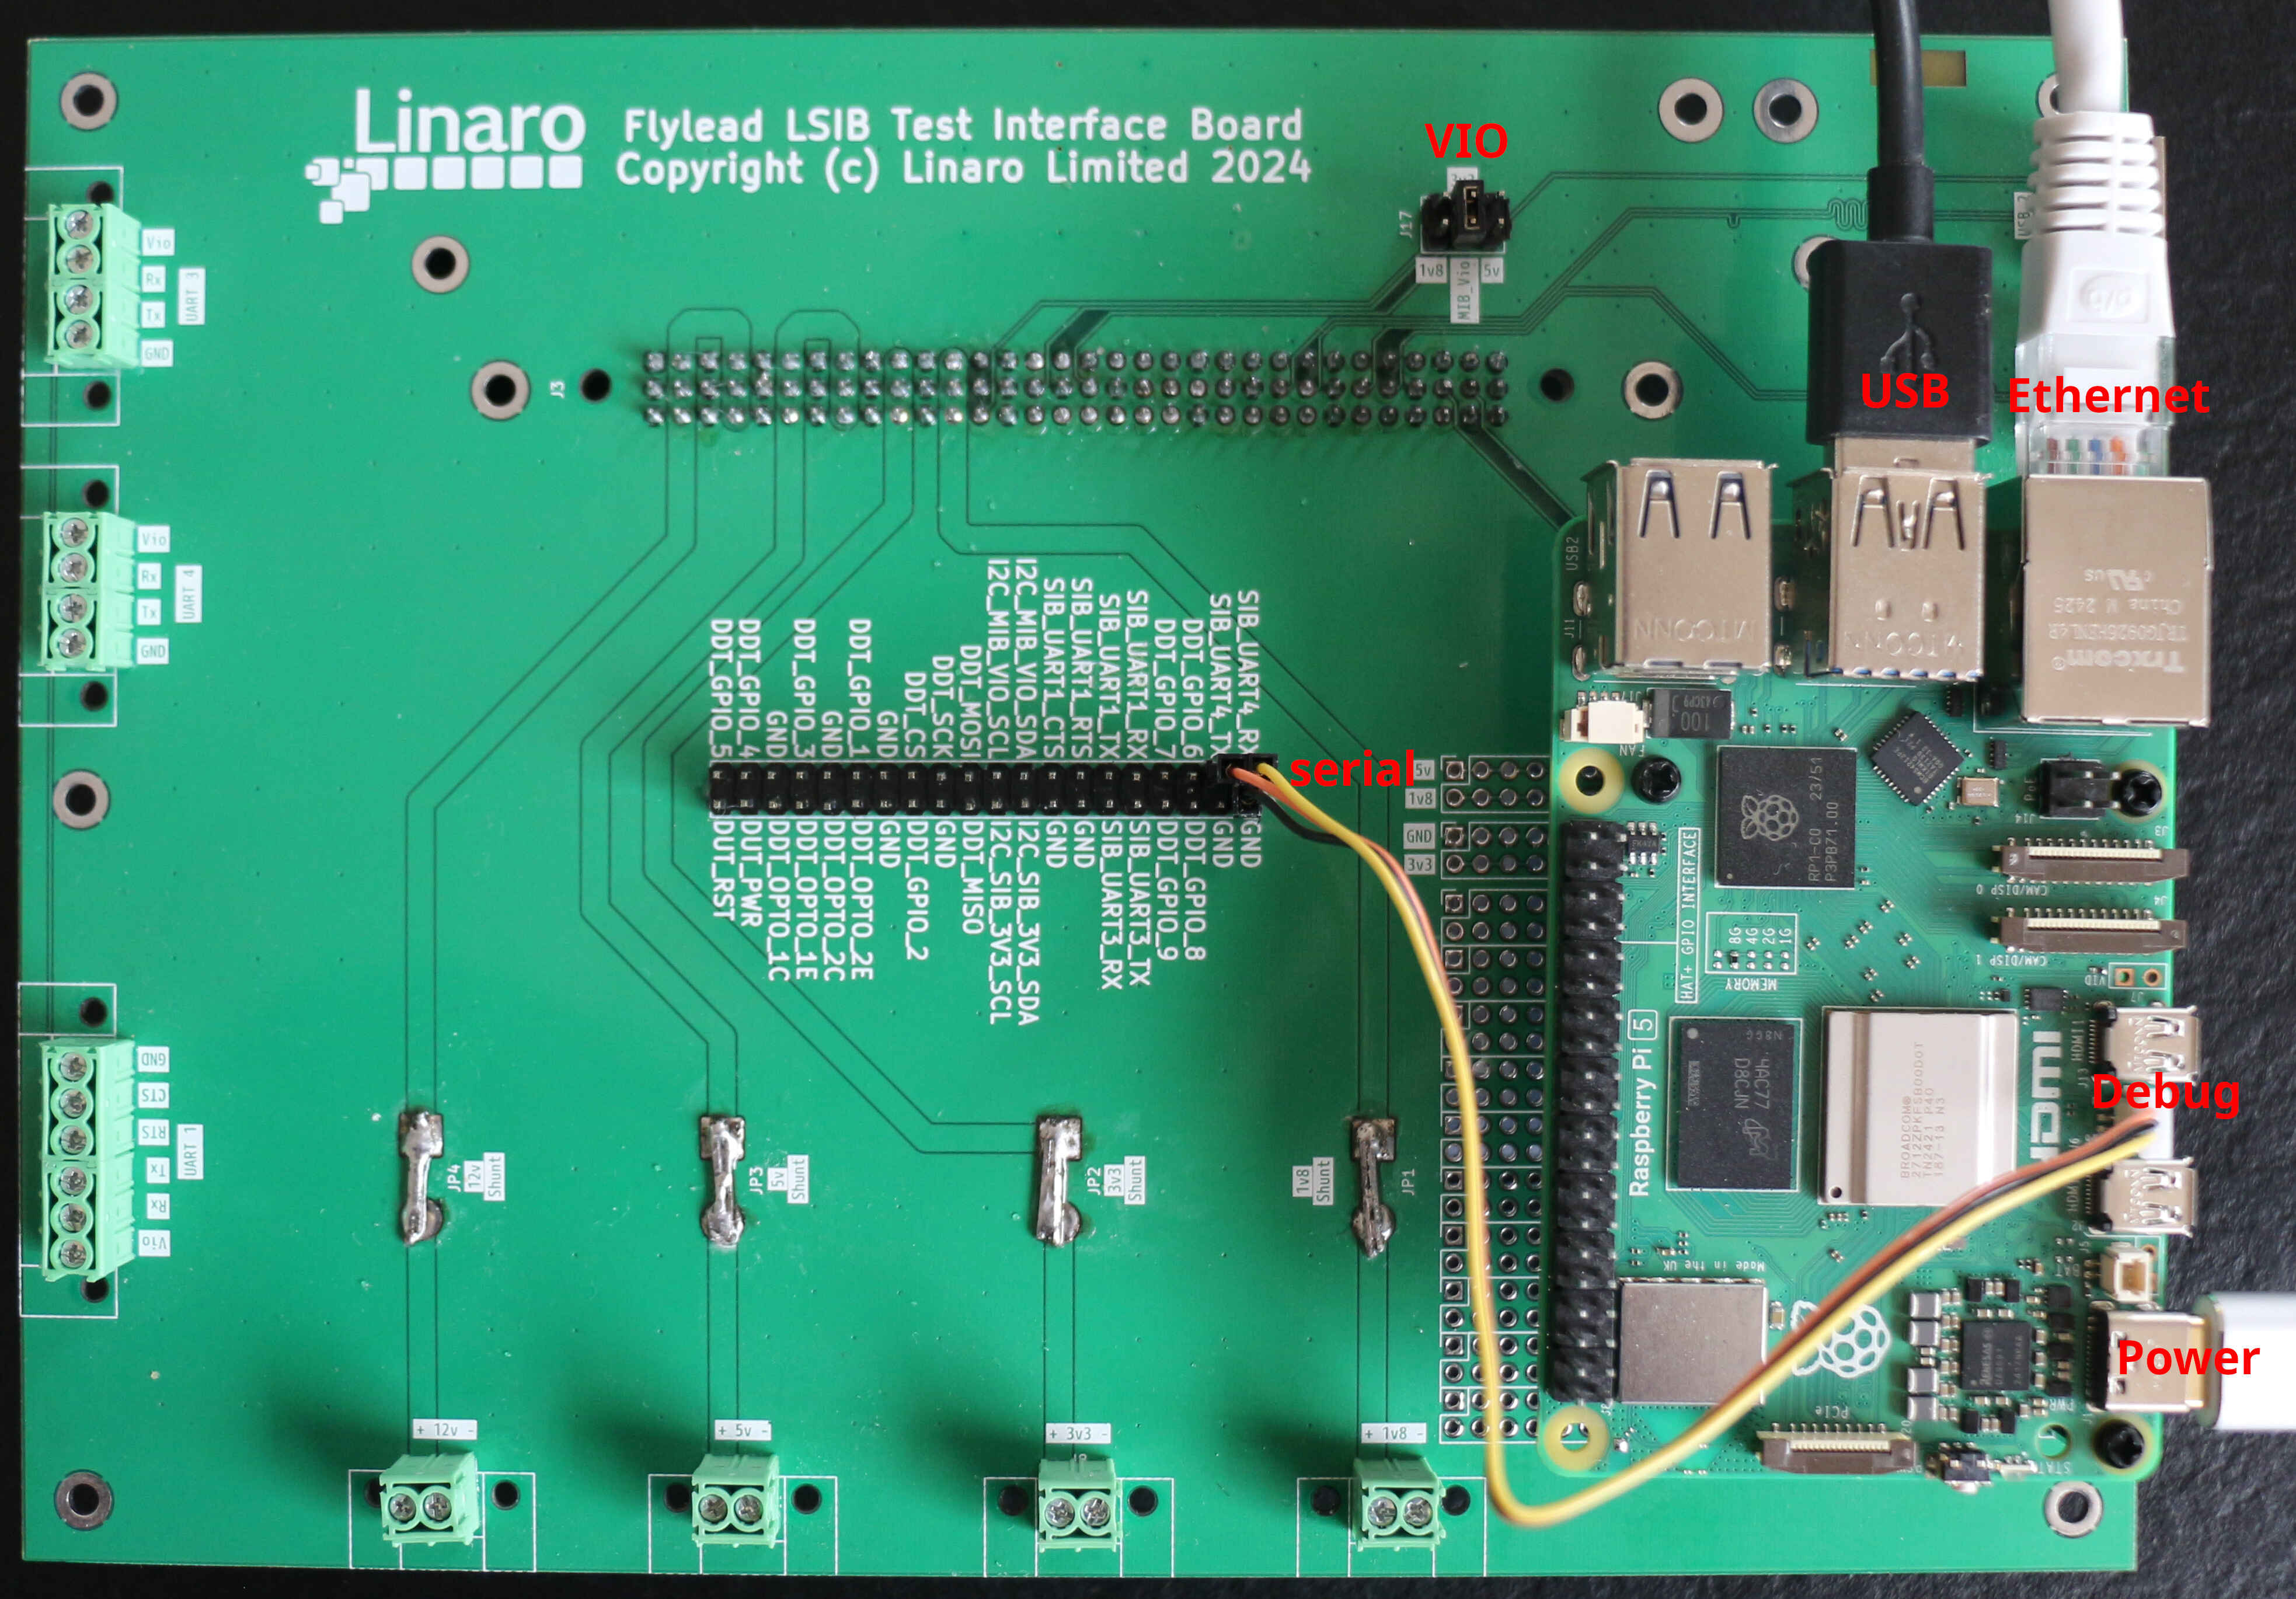
RPi5 connected to the MIB
Configuration
Set the voltage level switch on the top of the MIB to 3v3:
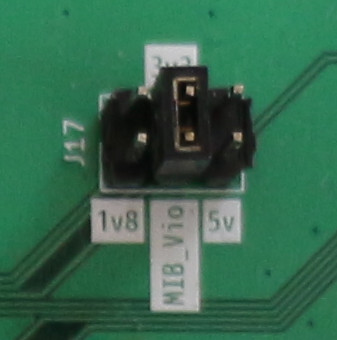
Vio level set to 3v3
Network
Connect the Raspberry Pi network interface to the LAA private network interface.
USB
Connect the LAA USB OTG port (front facing) to one of the Raspberry-Pi USB port.
Power
Connect a USB C-to-C cable from LAA Port 1 (facing upward) to the RPi USB power port.
Serial
Connect the RPi debug port to the flylead header in the middle.
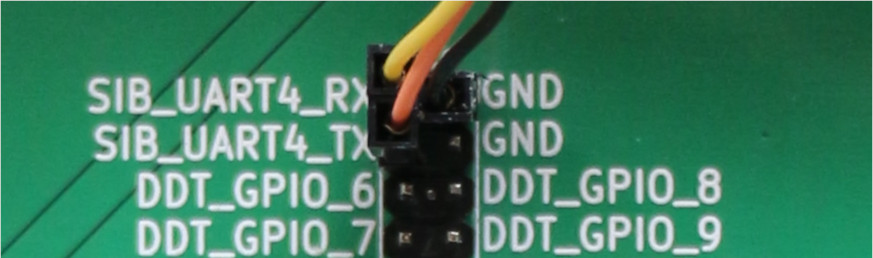
Serial connection
3-pin debug socket
The RPi5 provide debug and serial via a 1mm JST socket. You can either order one or use the one provided with the Raspberry Pi Debug Probe.
Software
In order for the Raspberry Pi DUT to be easily testable by LAVA, the DUT should boot to u-boot.
To boot the Raspberry Pi 5, we will boot from USB Mas Storage using USB Mass Storage Emulation.
USB Mass Storage Emulation
The LAA USB OTG port will act as a USB Mass Storage device with the content that you specify in LAVA.
This setup allows to update the bootloader without reflashing the DUT.
We provide pre-built image.
Setup a simple recovery mechanism
Refer to the RPi 4 documentation.