Dragonboard 845c
Enablement
LAVA by default is configured to work with this DUT + LAA setup. If you opt for a different setup you’ll have to change your DUT + LAA device configuration on LAVA.
For the Dragonboard 845c, use the RPi and 96 boards MIB.
Development kit
If you have a Dragonboard 845c from the Development kit, you’ll need to remove the camera mezzanie from the device.
Once you have removed the plastic and camera, ensure to keep the mezzanie spacer, otherwise the DB845c will not fit on the LAA due to the ethernet port being too far away from the GPIO pins.
MIB
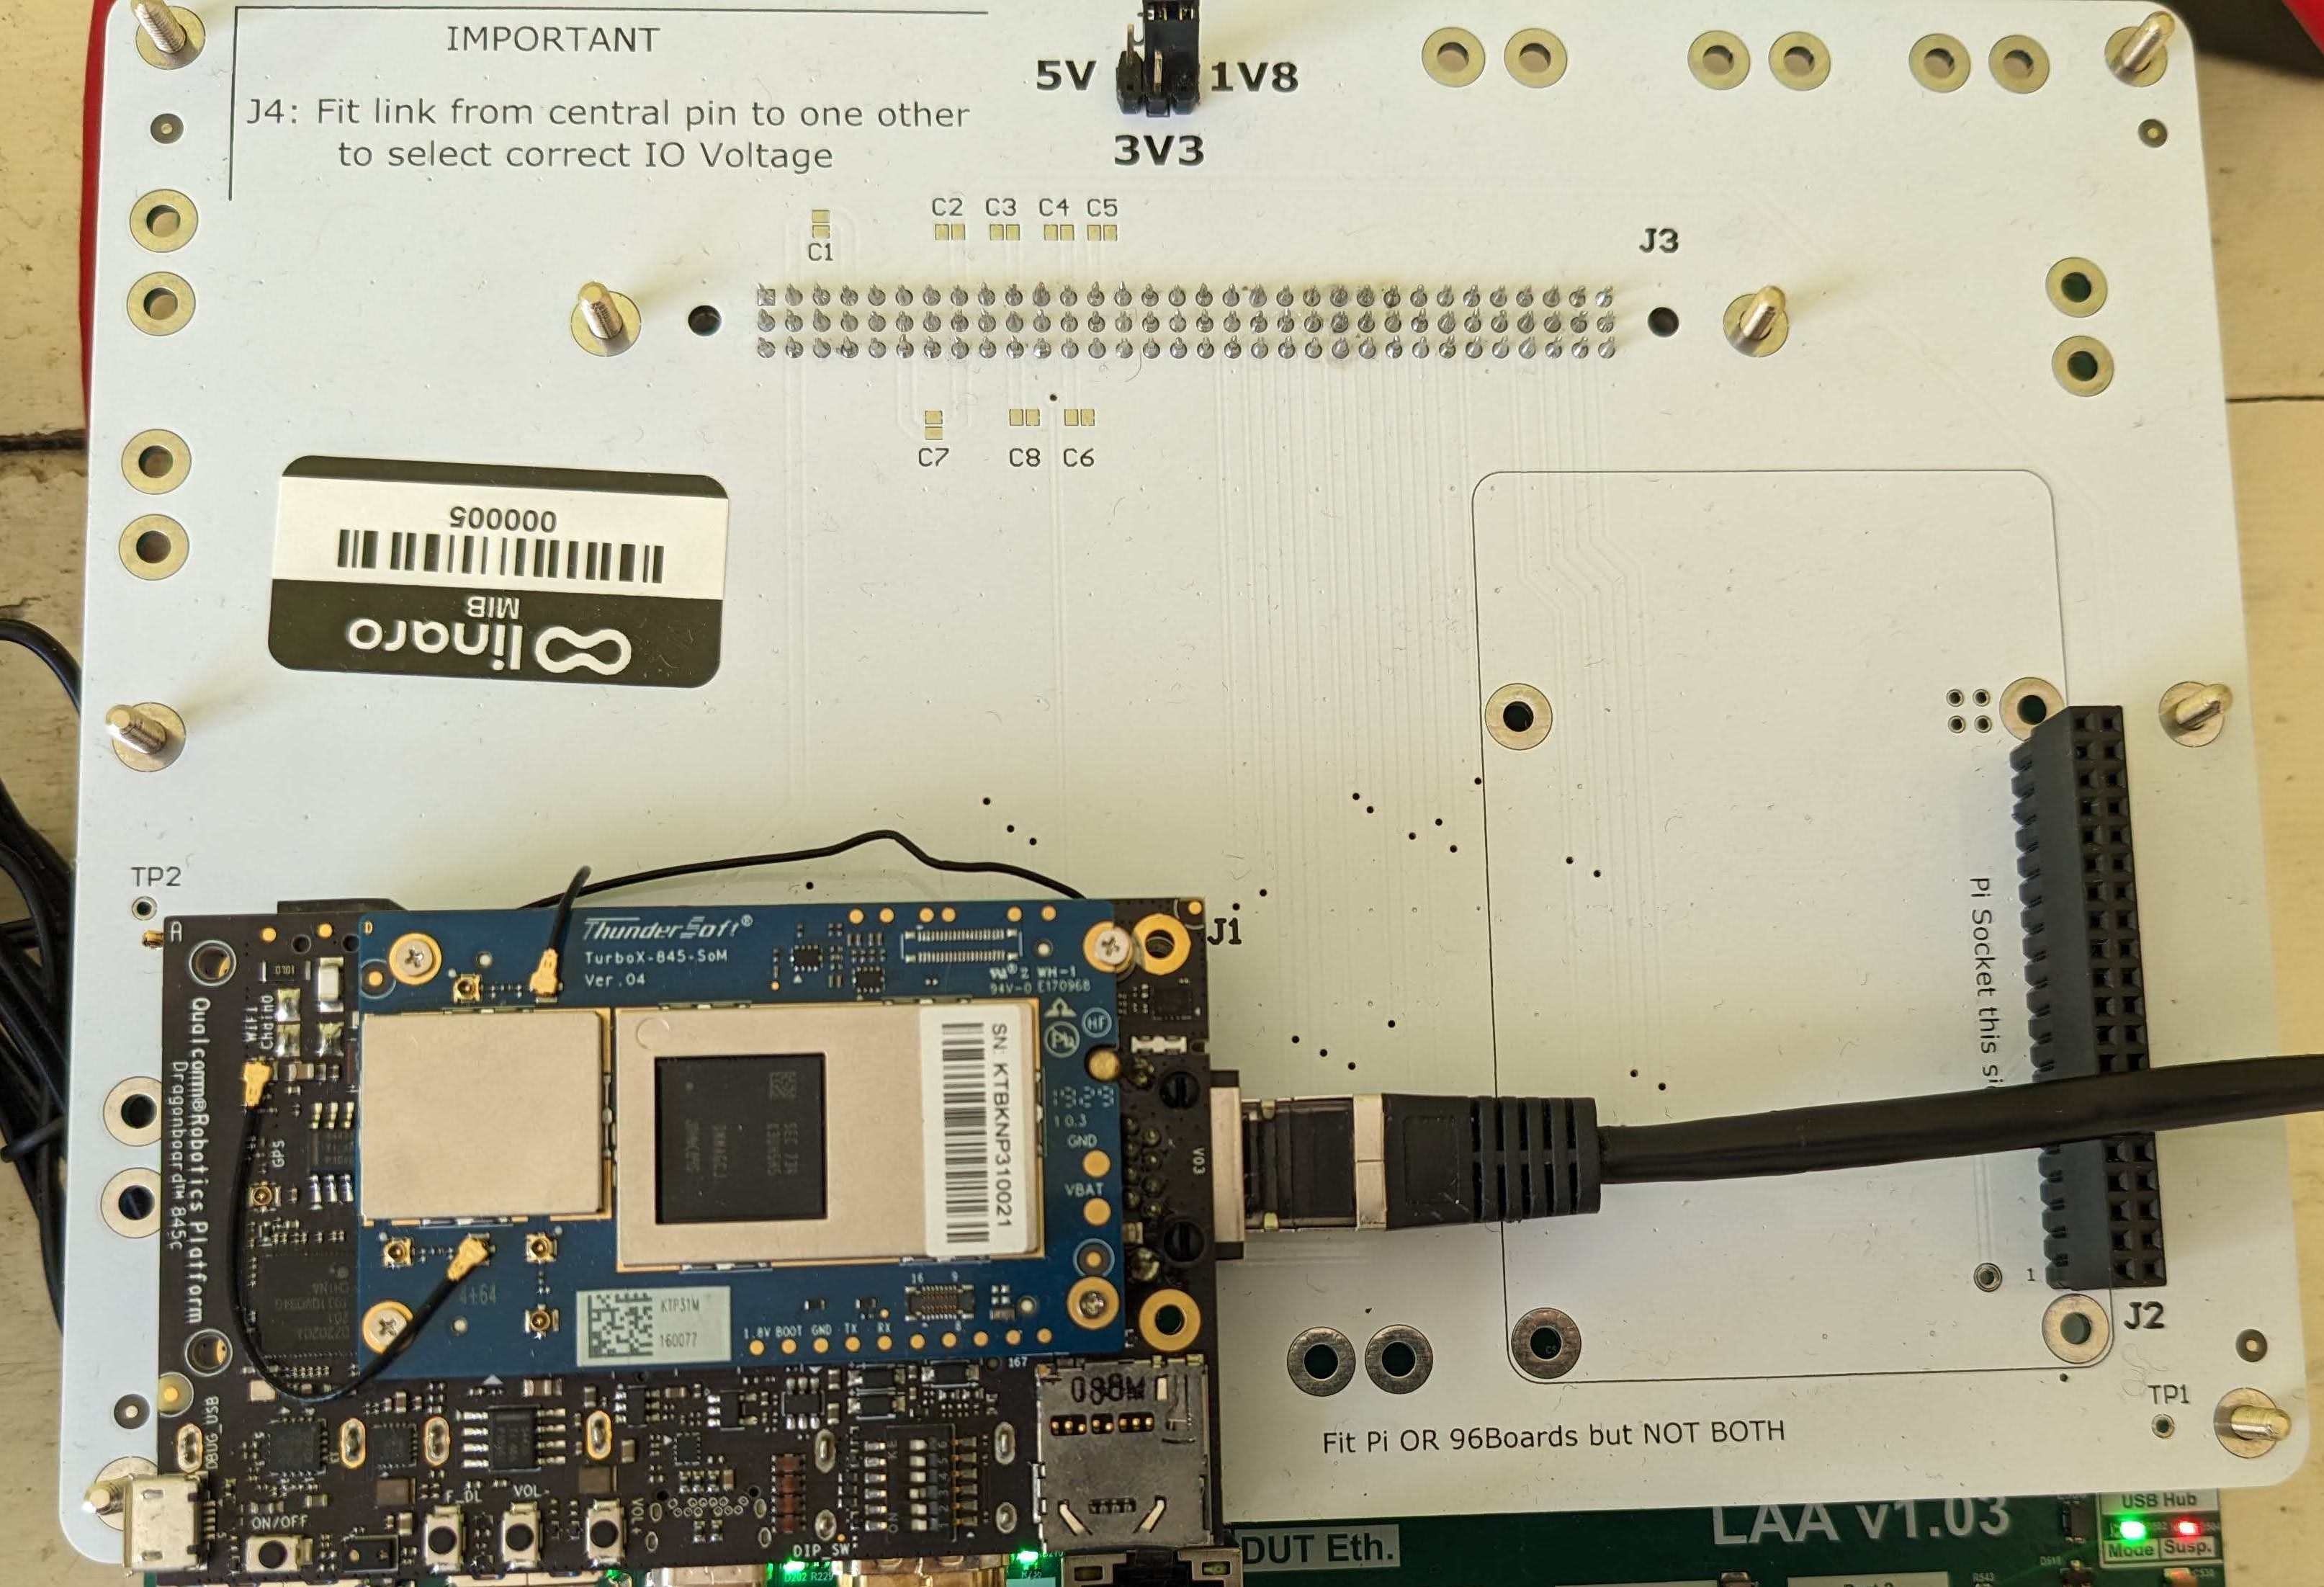
Dragonboard 845c on the LAA/MIB
Configuration
Set the voltage level switch on the top of the MIB to 1v8:
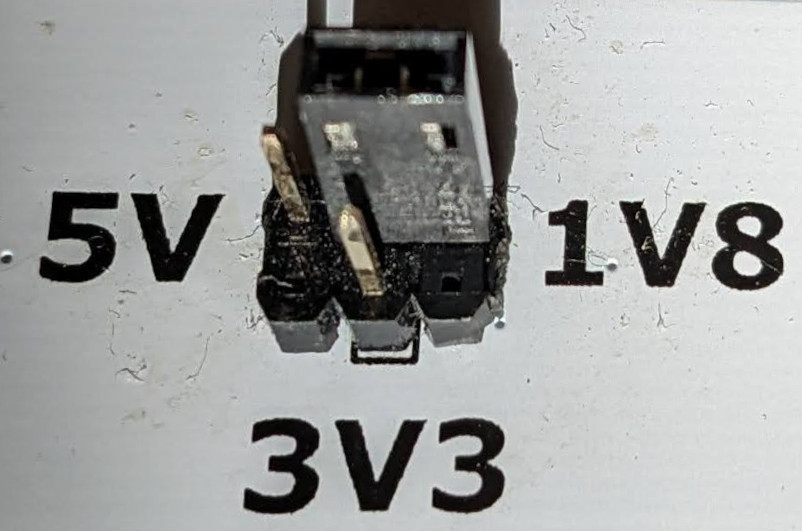
VIO level set to 1v8
96 boards header
Multiple DUTs
Only connect a Raspberry Pi or a 96 board on the MIB, not both at the same time!
Connect the Dragonboard 845c to the 96boards header. The Dragonboard 845c should fit in the printed rectangle.
Standoffs
You can use standoffs to securely attach the board to the MIB.
USB
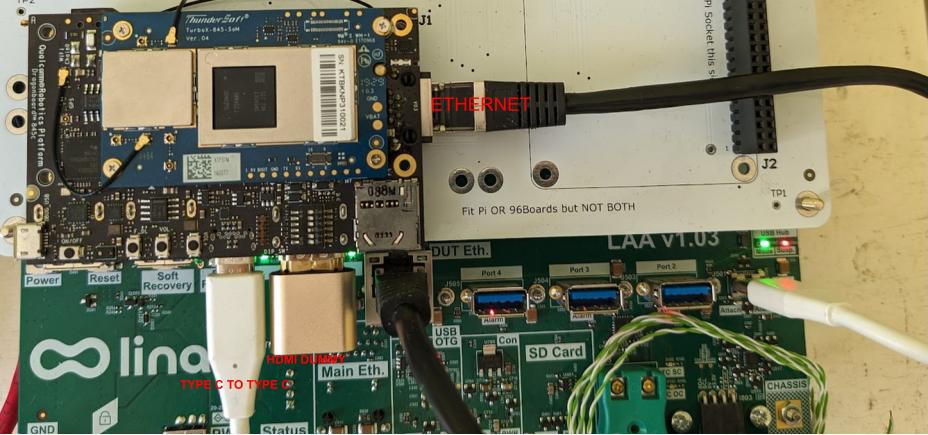
Connect a USB Type C to Type C from the LAA USB Port 1 USB DUT port 2 to the Dragonboard 845c USB C Port.
Board boot mode
Set the Boot Mode switches as shown in the picture below:
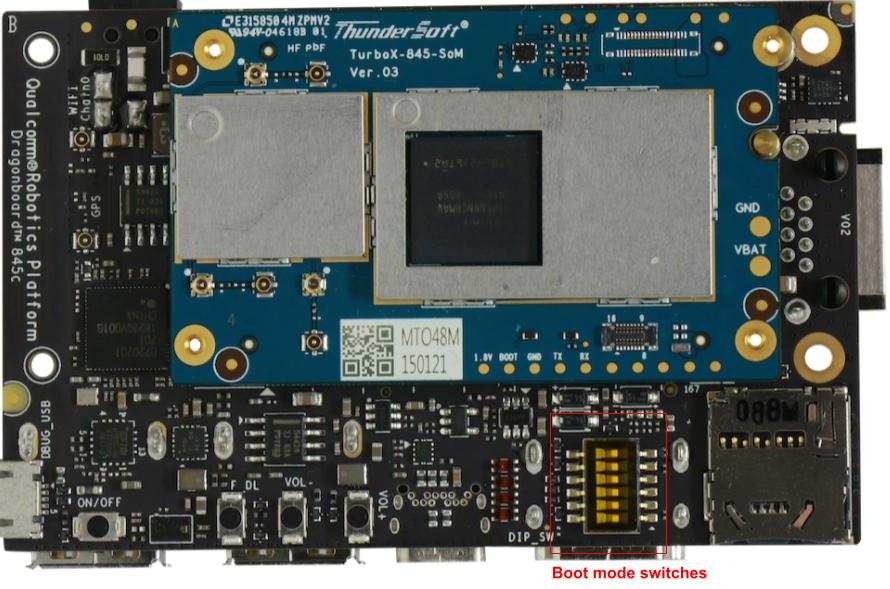
Boot mode switches
Switch 3 in the ON position all the rest off. Switch 3 enables boot on power.
For the reference purposes Switch 2 uses the FTDI/UART chip for serial output. We are not using this since serial output is coming through GPIO pins.
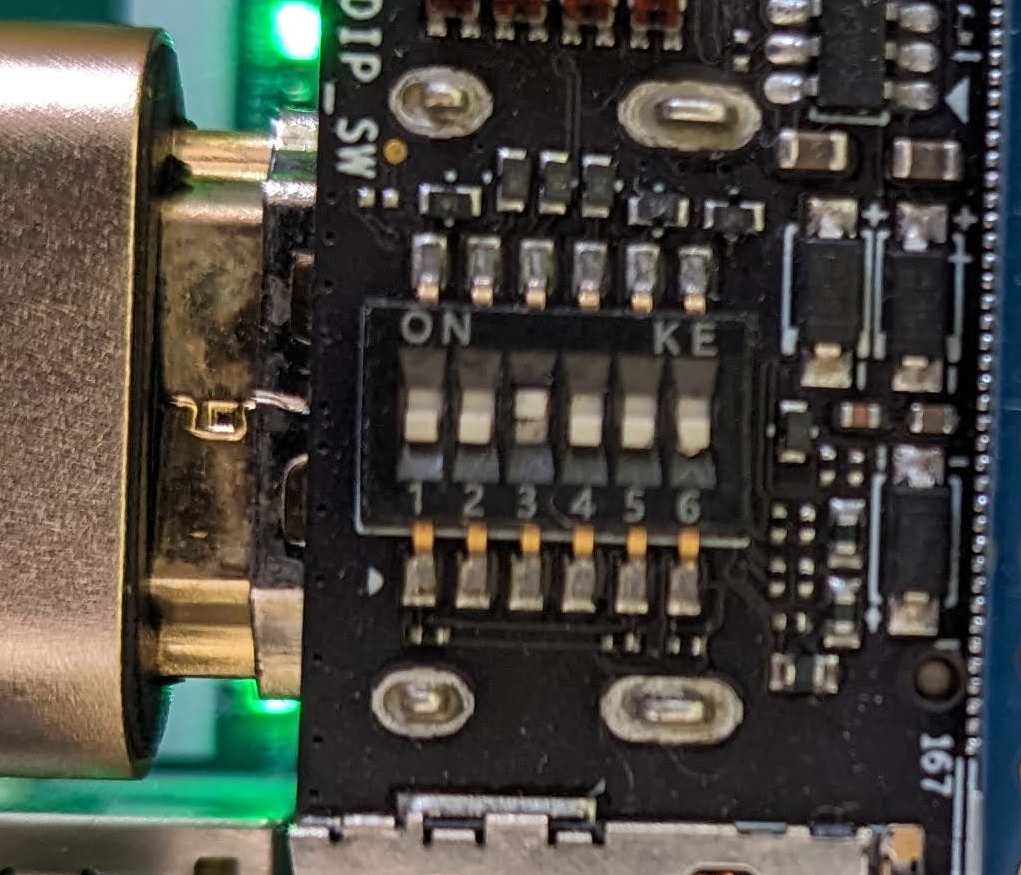
Ensure Boot mode / Number 3 is on (bottom)
Network
Dragonboard DB845c has a built in ethernet port, use a ethernet cable to connect the Dragonboard DB845c to the LAA.
Plug ethernet cable into the board and into the LAA private ethernet port.
Optional HDMI Dongle (Android)
A dummy HDMI dongle might be required if you are booting this board into Android. These can be easily purchased, but is required when booting AOSP since it will be expecting a display signal.
Network connected to the Dragonboard 845c
Software
Flashing Firmware
To get a Dragonboard 845C working on a LAA the board must boot into fastboot prompt. From there LAA will take over booting the board.
The guide to flashing is on the 96boards website
Some parts of the guide that you need to be aware of:
Download the latest version of firmware here. Ensure you download the AOSP version since the ABI partition of Androd version support the normal linux boot (but not the other way around).
Extract the zip file somewhere. Once extracted, at time of flashing file logfs_ufs_8mb.bin is missing which will caused the flash to fail. Open rawprogram4.xml in your text editor, and remove this file from the file.
Ensure only to power up the board with power source, and then push and hold the F_DL button. Be sure to plug the type C in AT THE END of this step. Otherwise you risk damaging the board due to usb TYPE C sending voltage.
Watch dmesg and ensure the board boots into “Modem mode”. usb 1-1.3: Qualcomm USB modem converter now attached to ttyUSB1
Clone or install Qualcomm’s QDL tool to flash the board.
Once you plug the board in to flash the board run this command
sudo /home/user/qdl/qdl prog_firehose_ddr.elf rawprogram?.xml patch?.xml. It is important you use full path, otherwise QDL won’t flash properly.The board will reboot into fastboot mode. Run fastboot devices to see the device appear. Then run
fastboot erase boot, to ensure boot parititon is erased and makes lava be bootable