Setting up the kv260
In this page we will be looking on how to prepare your kv260 board to be connected to the LAA and properly run.
Linux host
We will be assuming you are using a Linux-based Operating System.
Preparing the kv260 board
We will be assuming that we have with us a kv260 with a Starter SoM on it, and also a Manufacturer SoM that we plan to use:
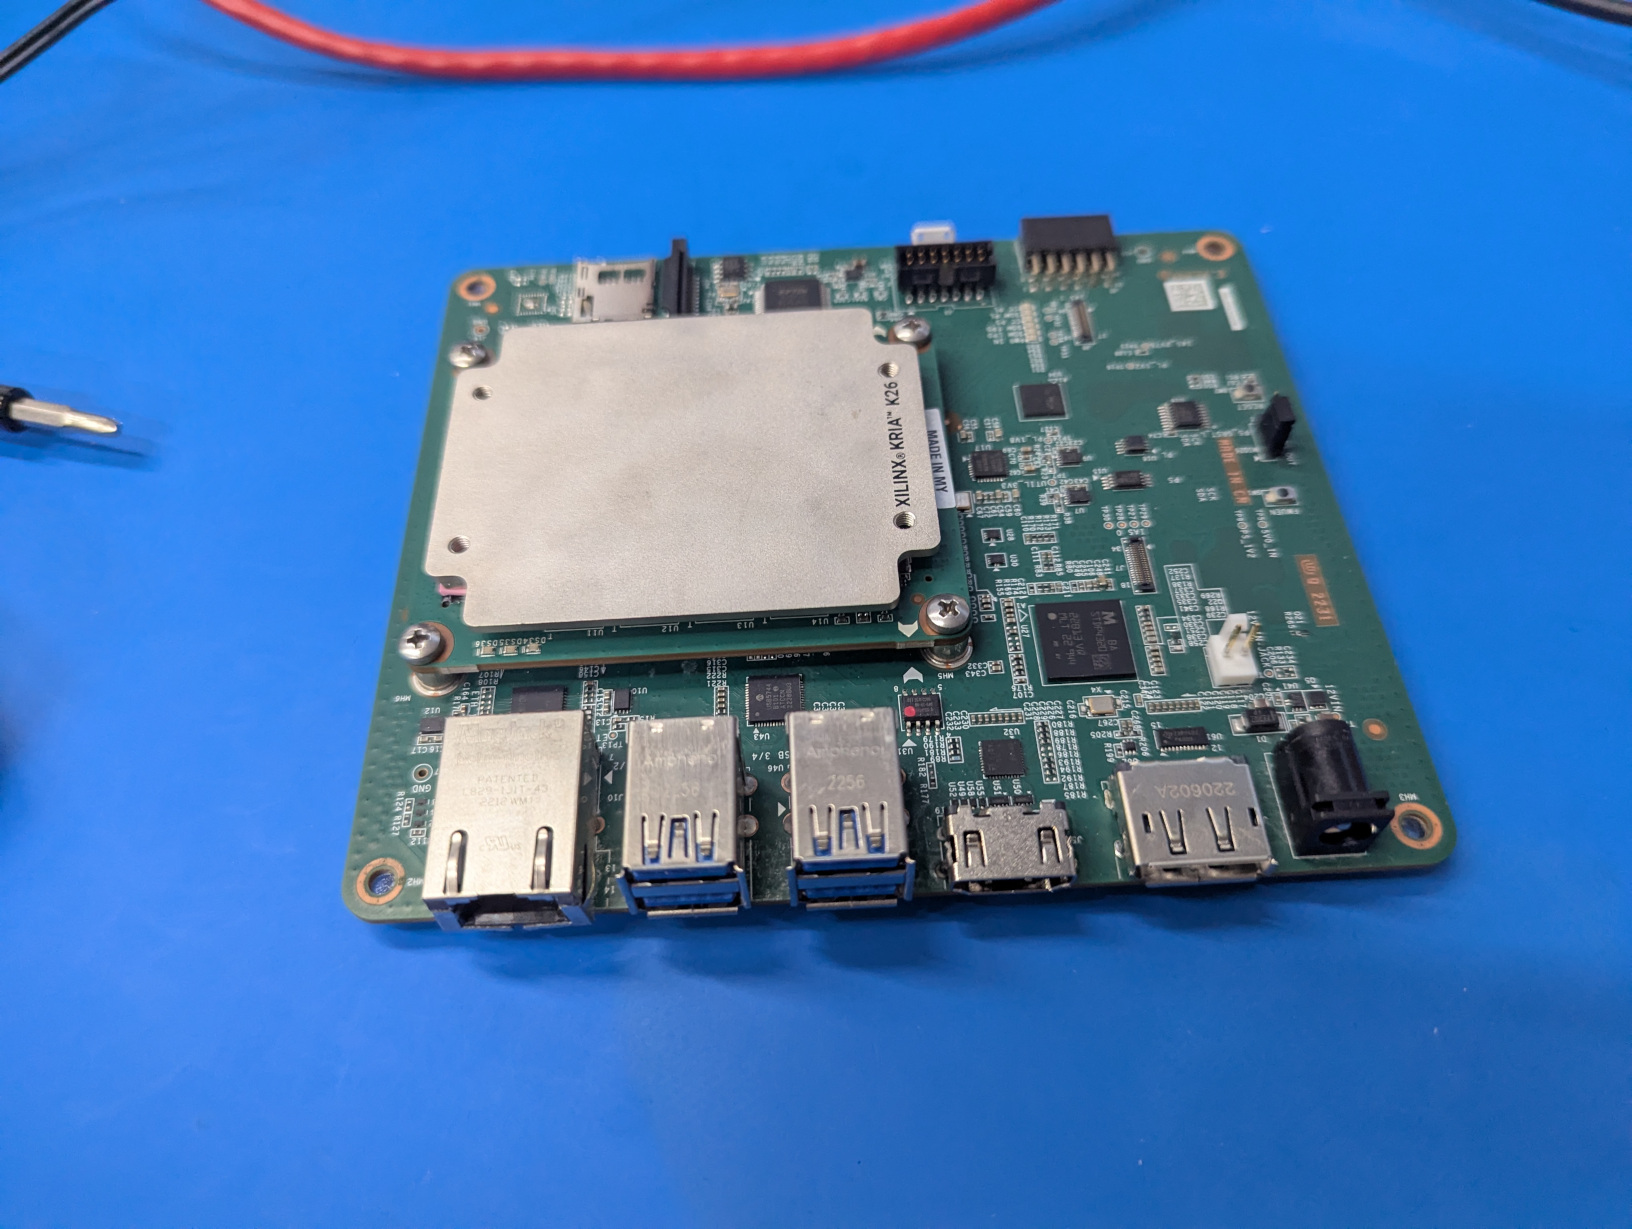
Dev Board with Starter SoM: Kria KV260 Vision AI Starter Kit
Manufacturer SoM: Kria K26 SoM
Starter SoM Not Supported
Our setup works only with a Manufacturer SoM at the moment, you’ll need to get your hands on one.
Preliminary Safe Checks
Let’s check that the Starter SoM is fully working first.
NF-A4x10 FLX Premium Fan
Take a USB to USB micro B cable and:
Connect one end to the only micro USB cable on the kv260 board.
Connect the other end to your machine (laptop or desktop)
At this point you should be able to see the serial ports available.
$ ls -l /dev/serial/by-id/
total 0
lrwxrwxrwx 1 root root 13 Feb  4 14:30 usb-Xilinx_ML_Carrier_Card_XFL1LJHON31V-if00-port0 -> ../../ttyUSB0
lrwxrwxrwx 1 root root 13 Feb  4 14:30 usb-Xilinx_ML_Carrier_Card_XFL1LJHON31V-if01-port0 -> ../../ttyUSB1
lrwxrwxrwx 1 root root 13 Feb  4 14:30 usb-Xilinx_ML_Carrier_Card_XFL1LJHON31V-if02-port0 -> ../../ttyUSB2
lrwxrwxrwx 1 root root 13 Feb  4 14:30 usb-Xilinx_ML_Carrier_Card_XFL1LJHON31V-if03-port0 -> ../../ttyUSB3
Start a serial connection with ttyUSB1.
$ sudo tio /dev/serial/by-id/usb-Xilinx_ML_Carrier_Card_XFL1LJHON31V-if01-port0
Power up the board and you should see some logs coming out. At the end of the booting you should get a terminal on the baord and the following.
ZynqMP>
ZynqMP>
ZynqMP>
ZynqMP>
This was the a “normal boot”. We want now to check a “recovery mode boot”, and
to do that we need to power on the kv260 board while pressing the FWUEN button.
FWUEN Button
So follow the following steps:
Power off the kv260 board
Check that the USB Micro cable is connected
Manually press the
FWUENbutton and don’t release itPower on the kv260 board
You should see logs coming out from the serial output. Check that it contains the folloling line.
MultiBootOffset: 0x3C0
If you get the same results we are good to continue with the next section. If not, you might want to go through the steps again or might need to double-check your kv206 board.
PC Setup
We will refer to the binaries and scripts available and documented in at this link
Please clone the repository in your workplace folder.
$ git clone https://github.com/wmamills/xilinx-lab-stuff
Issues
Feel free to open issues on GitHub if you need additional assistance on the tools.
Assuming that you have now the Vitis tool set available we can continue. We
need to set a couple of environmental variables.
$ export XILINX_VITIS=/home/example_path/Vitis/2021.2
$ export PATH=$XILINX_VITIS/bin:$PATH
XILINX_VITIS path
Please change `XILINX_VITIS` with your path.
Google drive
If you managed to download the file from the google drive link, you can need
to run install_program_flash. From there you can source use_program_flash
and you won’t need to think about the environment variables.
From now on all of the commands will assume that the environmental variables are properly set.
We need to make sure u-boot-tools is installed.
$ sudo apt-get install u-boot-tools
From the xilinx-lab-stuff we want to run a specific script, here are the
steps:
$ cd recovery-kria
$ ./mk-recovery-assets.sh
We can proceed with the Safe Test.
Safe Test
Make sure the Micro USB cable is connected to the kv260 board and power it on.
Start the serial with tio as before and let it boot. It should get to the
this point.
$ sudo tio /dev/serial/by-id/usb-Xilinx_ML_Carrier_Card_XFL1LJHON31V-if01-port0

# ...etc
# Press ENTER a few times

ZynqMP>
ZynqMP>
ZynqMP>
ZynqMP>
Assuming we are in xilinx-lab-stuff/program-flash-kv260, close tio and run
the safe-test-kv260 script in the repo. We should be getting this output:
$ ./safe-test-kv260
MAKE sure KV260 is powered on and stopped at U-boot
ensure there is only one Xilinx board attached to the PC
Hit enter to continue


****** Xilinx Program Flash
****** Program Flash v2021.2 (64-bit)
  **** SW Build 3363252 on 2021-10-14-04:41:01
    ** Copyright 1986-2020 Xilinx, Inc. All Rights Reserved.


WARNING: Failed to connect to hw_server at TCP:127.0.0.1:3121
Attempting to launch hw_server at TCP:127.0.0.1:3121

Connected to hw_server @ TCP:127.0.0.1:3121

Retrieving Flash info...

Initialization done
Using default mini u-boot image file - /home/manulin/workspace/Xilinx-2021.2-program-flash/Vitis/2021.2/data/xicom/cfgmem/uboot/zynqmp_qspi_x4_single.bin
===== mrd->addr=0xFF5E0204, data=0x00000222 =====
BOOT_MODE REG = 0x0222
WARNING: [xicom-50-100]
Downloading FSBL...
Running FSBL...
===== mrd->addr=0xFFD80044, data=0x00000000 =====
===== mrd->addr=0xFFD80044, data=0x00000003 =====
Finished running FSBL.


U-Boot 2021.01-00102-g43adebe (Oct 11 2021 - 01:44:06 -0600)

Model: ZynqMP MINI QSPI SINGLE
Board: Xilinx ZynqMP
DRAM:  WARNING: Initializing TCM overwrites TCM content
256 KiB
EL Level: EL3
Multiboot:  960
In:    dcc
Out:   dcc
Err:   dcc
ZynqMP> sf probe 0 0 0
SF: Detected n25q512a with page size 256 Bytes, erase size 64 KiB, total 64 MiB
ZynqMP> Sector size = 65536.
f probe 0 0 0
Performing Erase Operation...
sf erase 140000 10000
SF: 65536 bytes @ 0x140000 Erased: OK
ZynqMP> Erase Operation successful.
INFO: [xicom-50-44]
Performing Blank Check Operation...
0%...sf read FFFC0000 140000 10000
device 0 offset 0x140000, size 0x10000
SF: 65536 bytes @ 0x140000 Read: OK
ZynqMP> cmp.b FFFC0000 FFFD0000 10000
Total of 65536 byte(s) were the same
ZynqMP> INFO: [xicom-50-44]
Blank Check Operation successful. The part is blank.
Performing Program Operation...
sf write FFFC0000 140000 10000
device 0 offset 0x140000, size 0x10000
SF: 65536 bytes @ 0x140000 Written: OK
ZynqMP> Program Operation successful.
INFO: [xicom-50-44]
Performing Verify Operation...
sf read FFFC0000 140000 10000
device 0 offset 0x140000, size 0x10000
SF: 65536 bytes @ 0x140000 Read: OK
ZynqMP> cmp.b FFFC0000 FFFD0000 10000
Total of 65536 byte(s) were the same
ZynqMP> INFO: [xicom-50-44]
Verify Operation successful.

Flash Operation Successful
We can now proceed in substituting the Starter SoM with the Manufacturer SoM.
Substitution
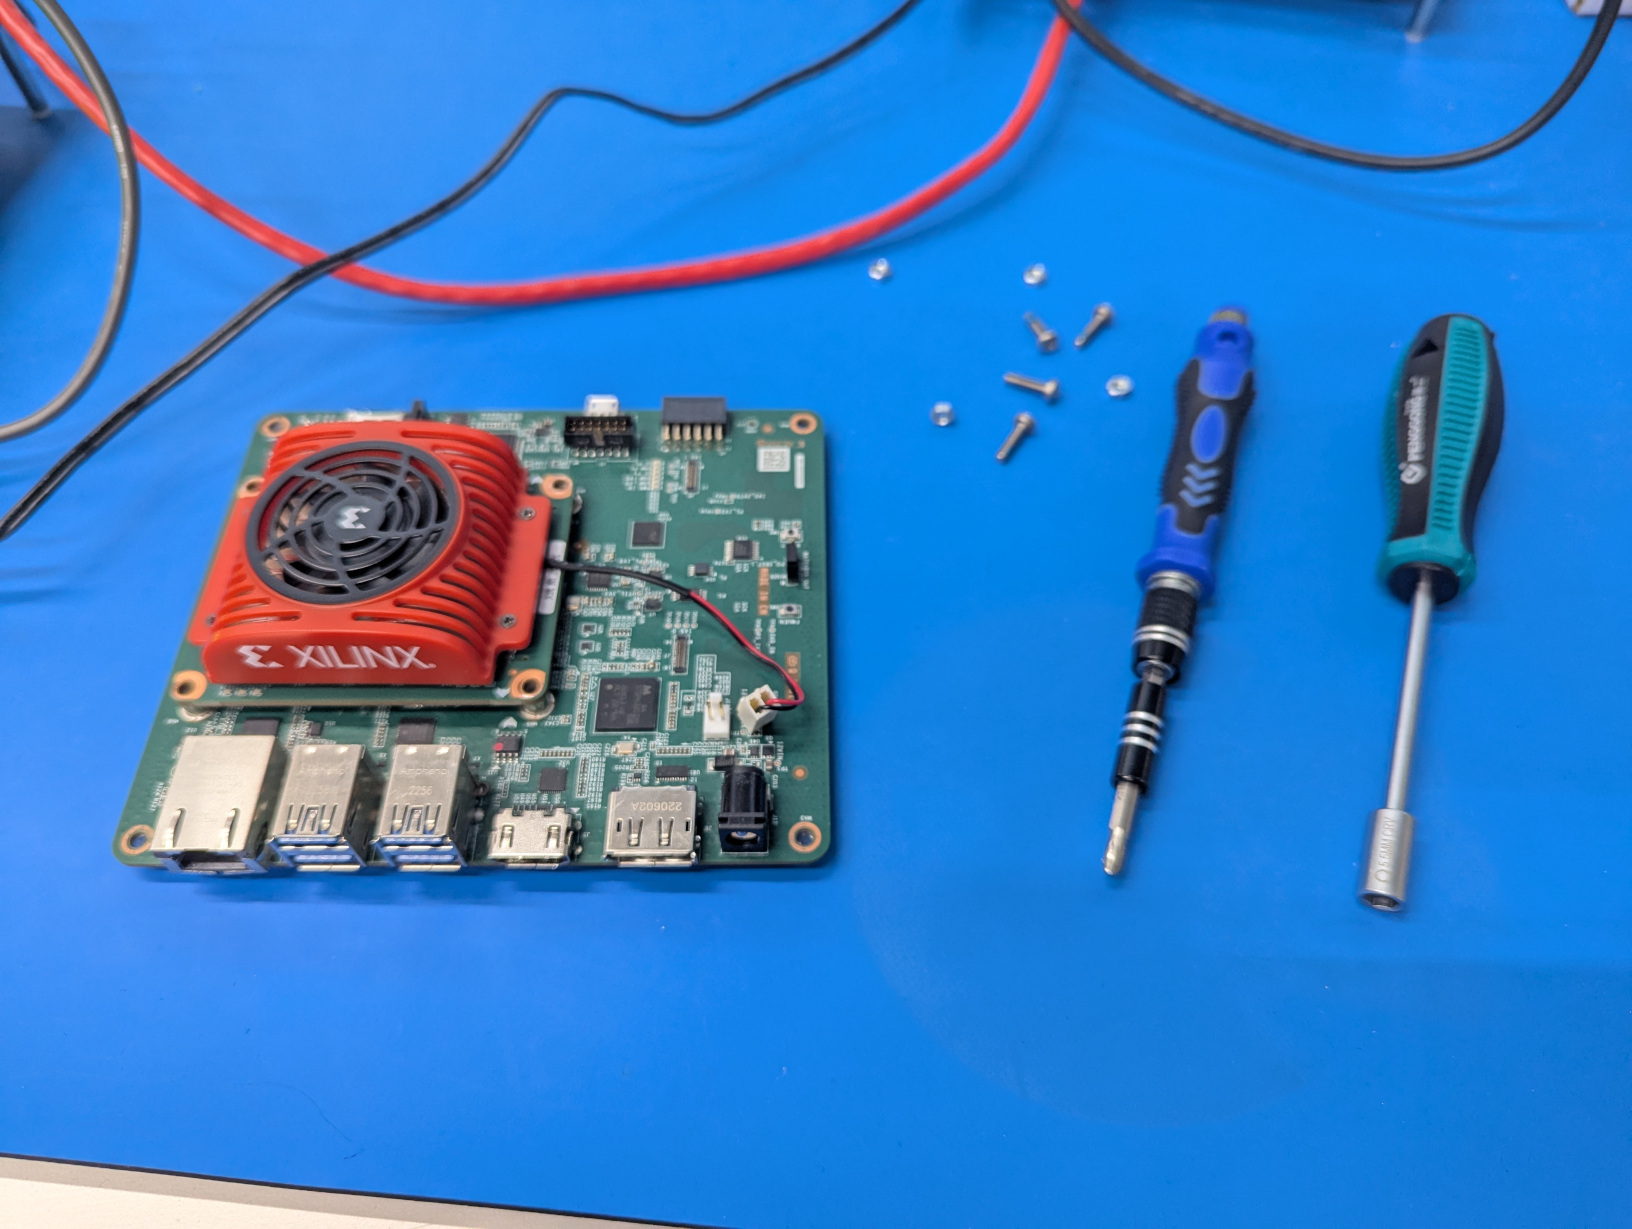
Let’s take our kv260 with a Start SoM, recognizable by the red hat on the heatsink and fan. And let’s remove the SoM.
kv260 Board
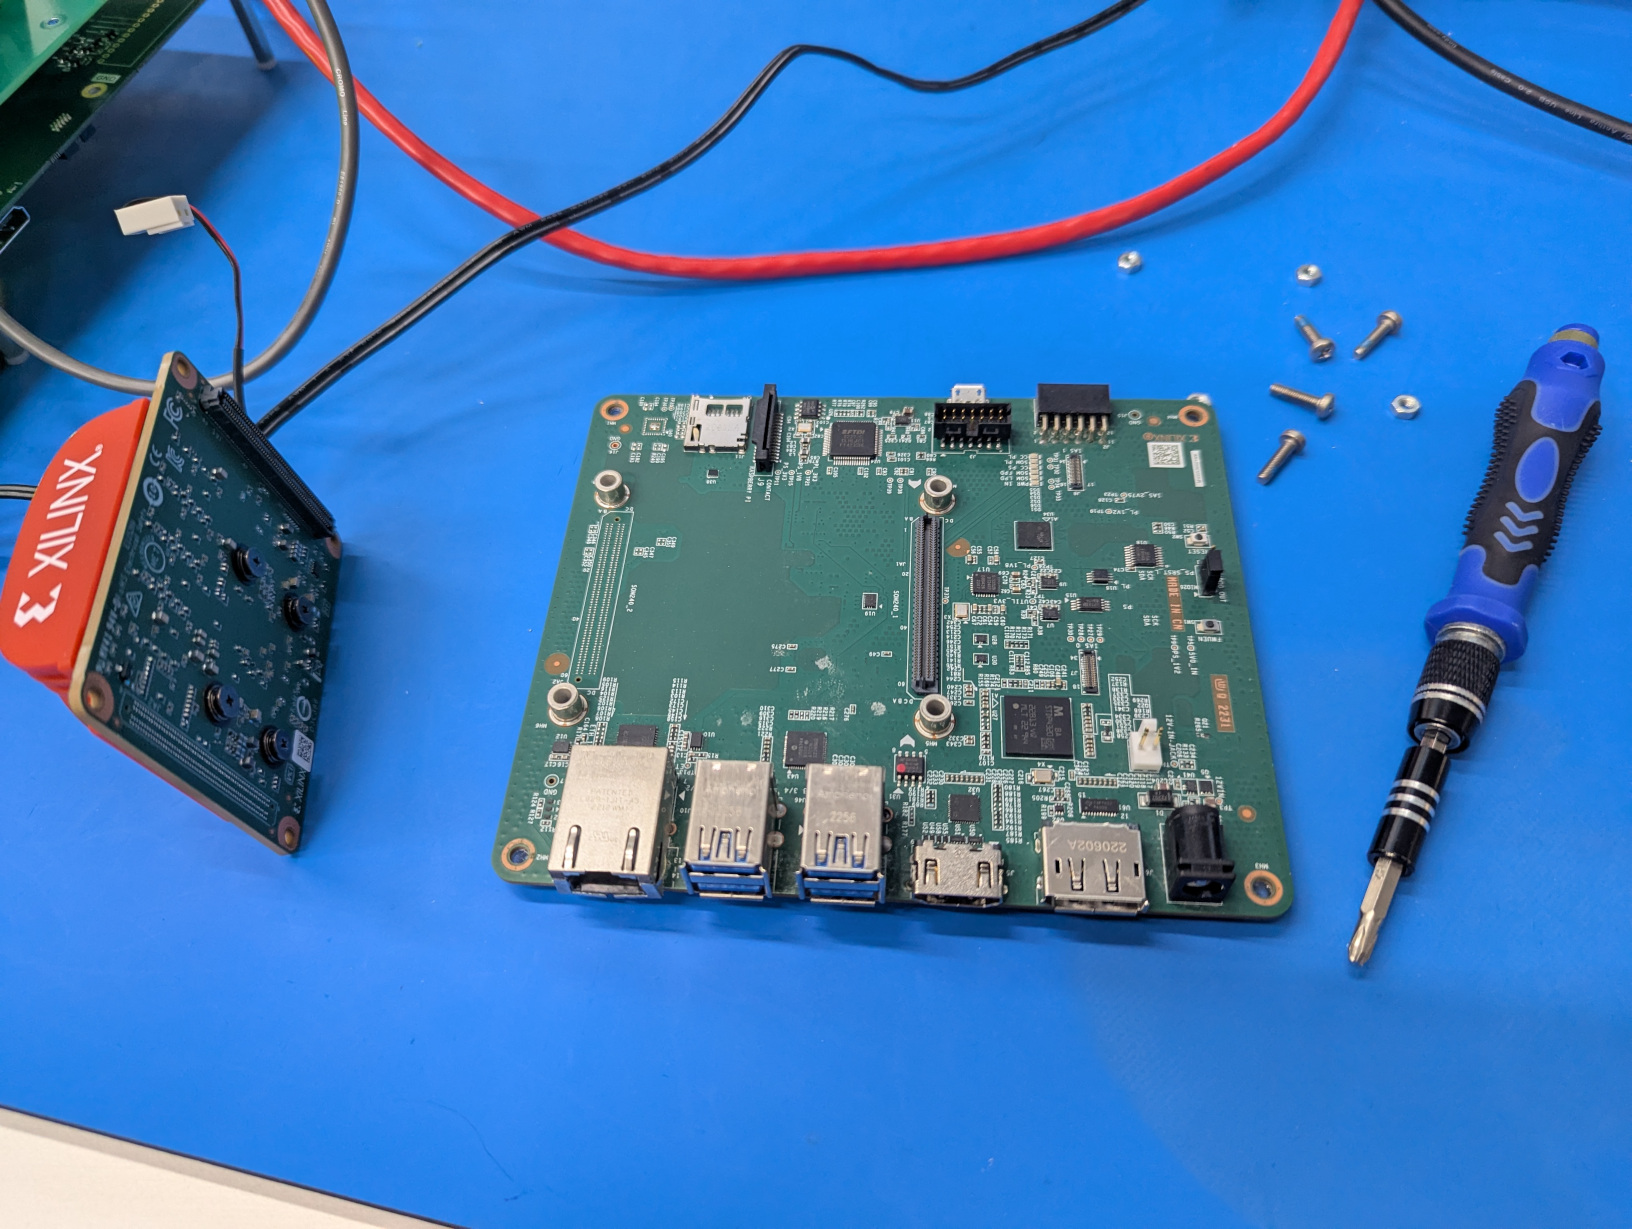
Next we want to take our Manufacturer SoM and mount it where the Starter SoM was.
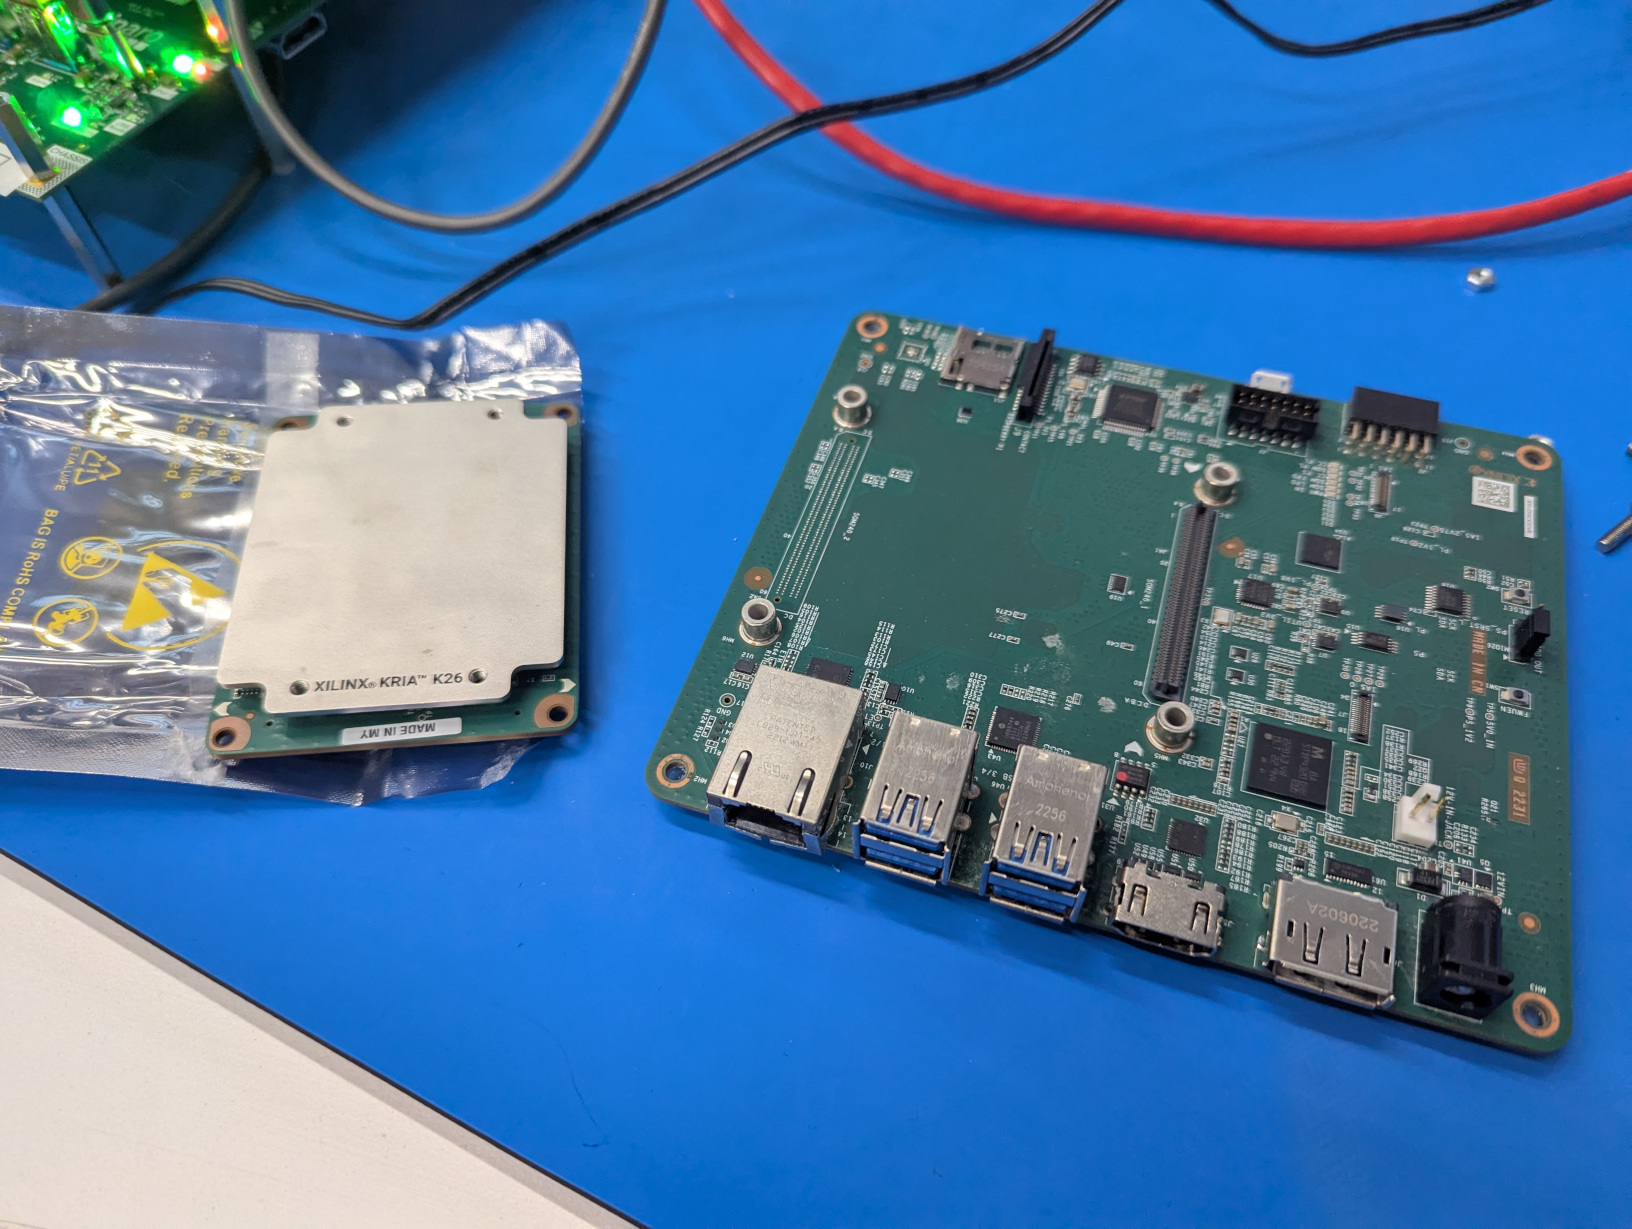
SoM to mount
SoM mounted
SoM Alignment
Please make sure that the Manufacturer SoM is place correctly. There are little arrows on the SoM and the development board that must to match.
Connect the USB Micro and power up the kv260 board to run another safe test.
$ ./safe-test-kv260
MAKE sure KV260 is powered on an stopped at U-boot
ensure there is only one Xilinx board attached to the PC
Hit enter to continue


****** Xilinx Program Flash
****** Program Flash v2021.2 (64-bit)
  **** SW Build 3363252 on 2021-10-14-04:41:01
    ** Copyright 1986-2020 Xilinx, Inc. All Rights Reserved.


WARNING: Failed to connect to hw_server at TCP:127.0.0.1:3121
Attempting to launch hw_server at TCP:127.0.0.1:3121

Connected to hw_server @ TCP:127.0.0.1:3121

Retrieving Flash info...

Initialization done
Using default mini u-boot image file - /home/manulin/workspace/Xilinx-2021.2-program-flash/Vitis/2021.2/data/xicom/cfgmem/uboot/zynqmp_qspi_x4_single.bin
===== mrd->addr=0xFF5E0204, data=0x00000222 =====
BOOT_MODE REG = 0x0222
WARNING: [xicom-50-100]
Downloading FSBL...
Running FSBL...
===== mrd->addr=0xFFD80044, data=0x00000000 =====
===== mrd->addr=0xFFD80044, data=0x00000003 =====
Finished running FSBL.


U-Boot 2021.01-00102-g43adebe (Oct 11 2021 - 01:44:06 -0600)

Model: ZynqMP MINI QSPI SINGLE
Board: Xilinx ZynqMP
DRAM:  WARNING: Initializing TCM overwrites TCM content
256 KiB
EL Level: EL3
Multiboot:  16384
In:    dcc
Out:   dcc
Err:   dcc
ZynqMP> sf probe 0 0 0
SF: Detected n25q512a with page size 256 Bytes, erase size 64 KiB, total 64 MiB
ZynqMP> Sector size = 65536.
f probe 0 0 0
Performing Erase Operation...
sf erase 140000 10000
SF: 65536 bytes @ 0x140000 Erased: OK
ZynqMP> Erase Operation successful.
INFO: [xicom-50-44]
Performing Blank Check Operation...
0%...sf read FFFC0000 140000 10000
device 0 offset 0x140000, size 0x10000
SF: 65536 bytes @ 0x140000 Read: OK
ZynqMP> cmp.b FFFC0000 FFFD0000 10000
Total of 65536 byte(s) were the same
ZynqMP> INFO: [xicom-50-44]
Blank Check Operation successful. The part is blank.
Performing Program Operation...
sf write FFFC0000 140000 10000
device 0 offset 0x140000, size 0x10000
SF: 65536 bytes @ 0x140000 Written: OK
ZynqMP> Program Operation successful.
INFO: [xicom-50-44]
Performing Verify Operation...
sf read FFFC0000 140000 10000
device 0 offset 0x140000, size 0x10000
SF: 65536 bytes @ 0x140000 Read: OK
ZynqMP> cmp.b FFFC0000 FFFD0000 10000
Total of 65536 byte(s) were the same
ZynqMP> INFO: [xicom-50-44]
Verify Operation successful.

Flash Operation Successful
We can now add the fan and heatsink on the Manufacturer SoM.
Fan and Heatsink
We will be using this fan.
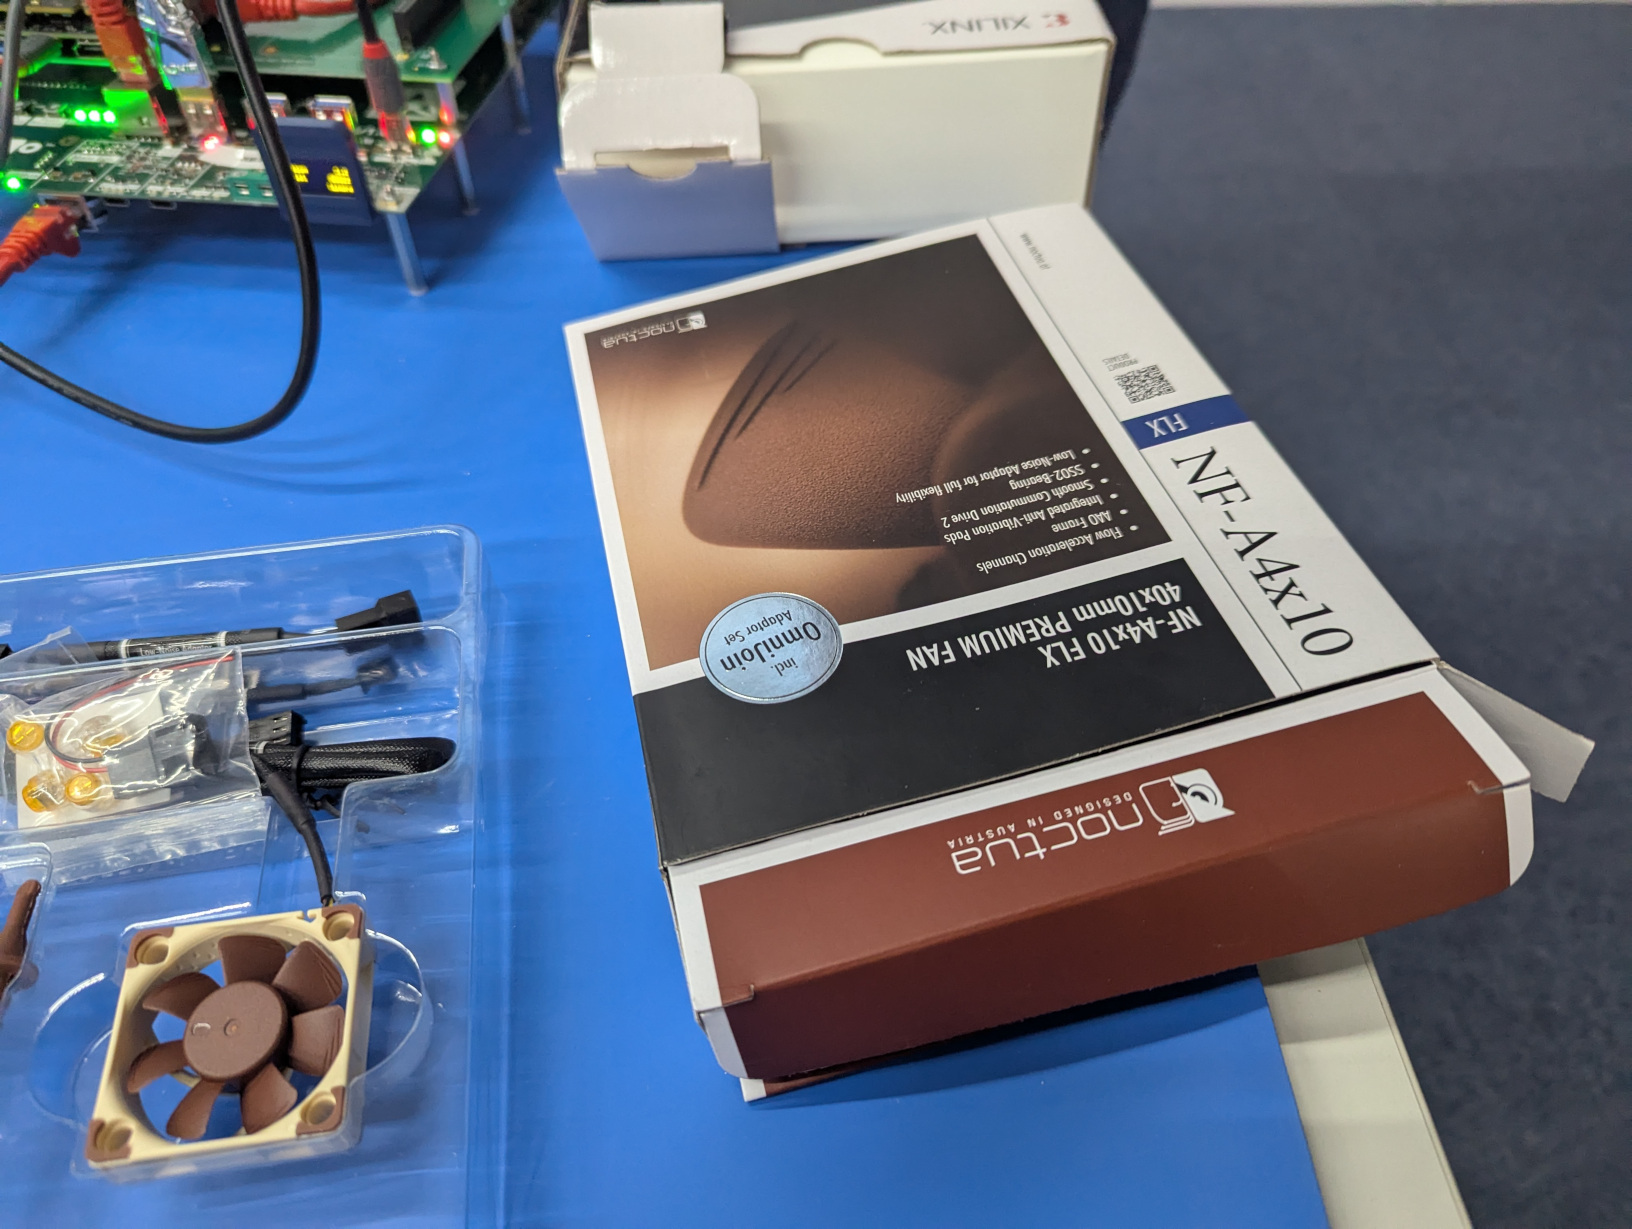
NF-A4x10 FLX Premium Fan
Let’s open the box and have a look what we have in front of us and attach the fan on the heatsink.
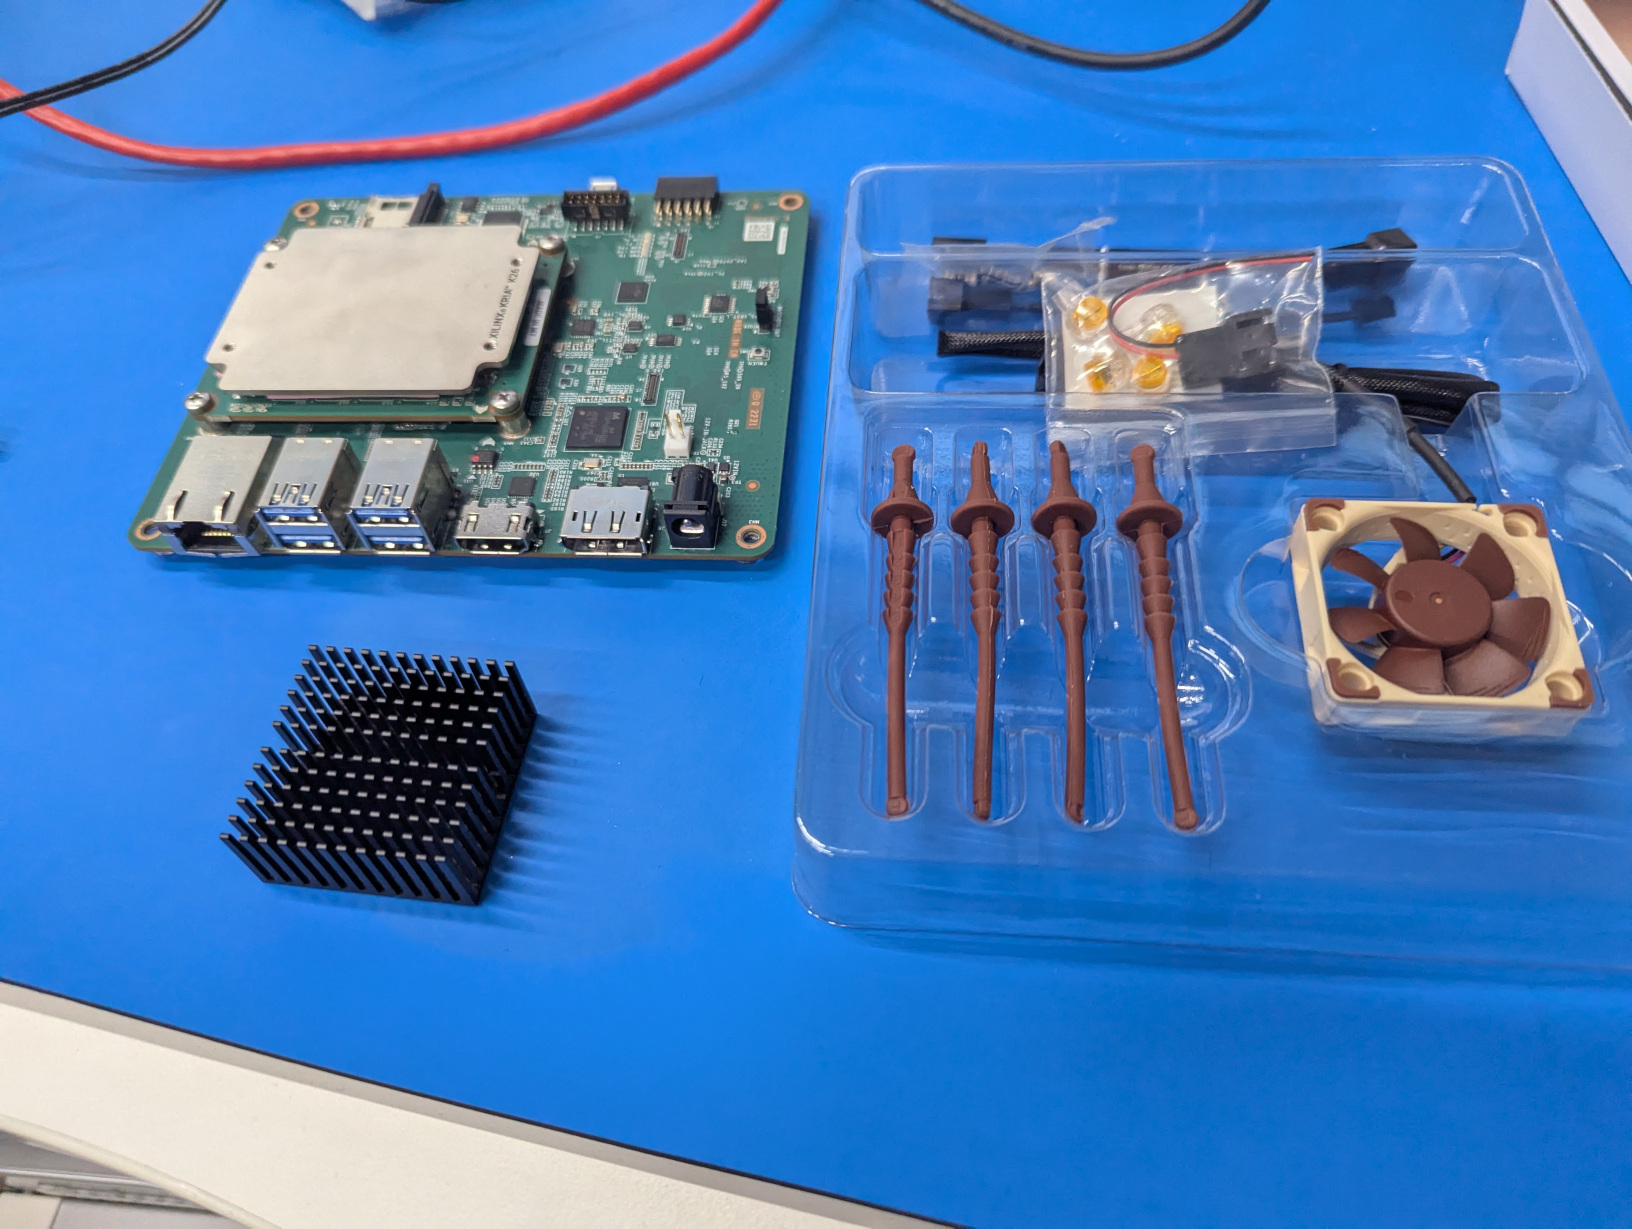
Fan heatsink
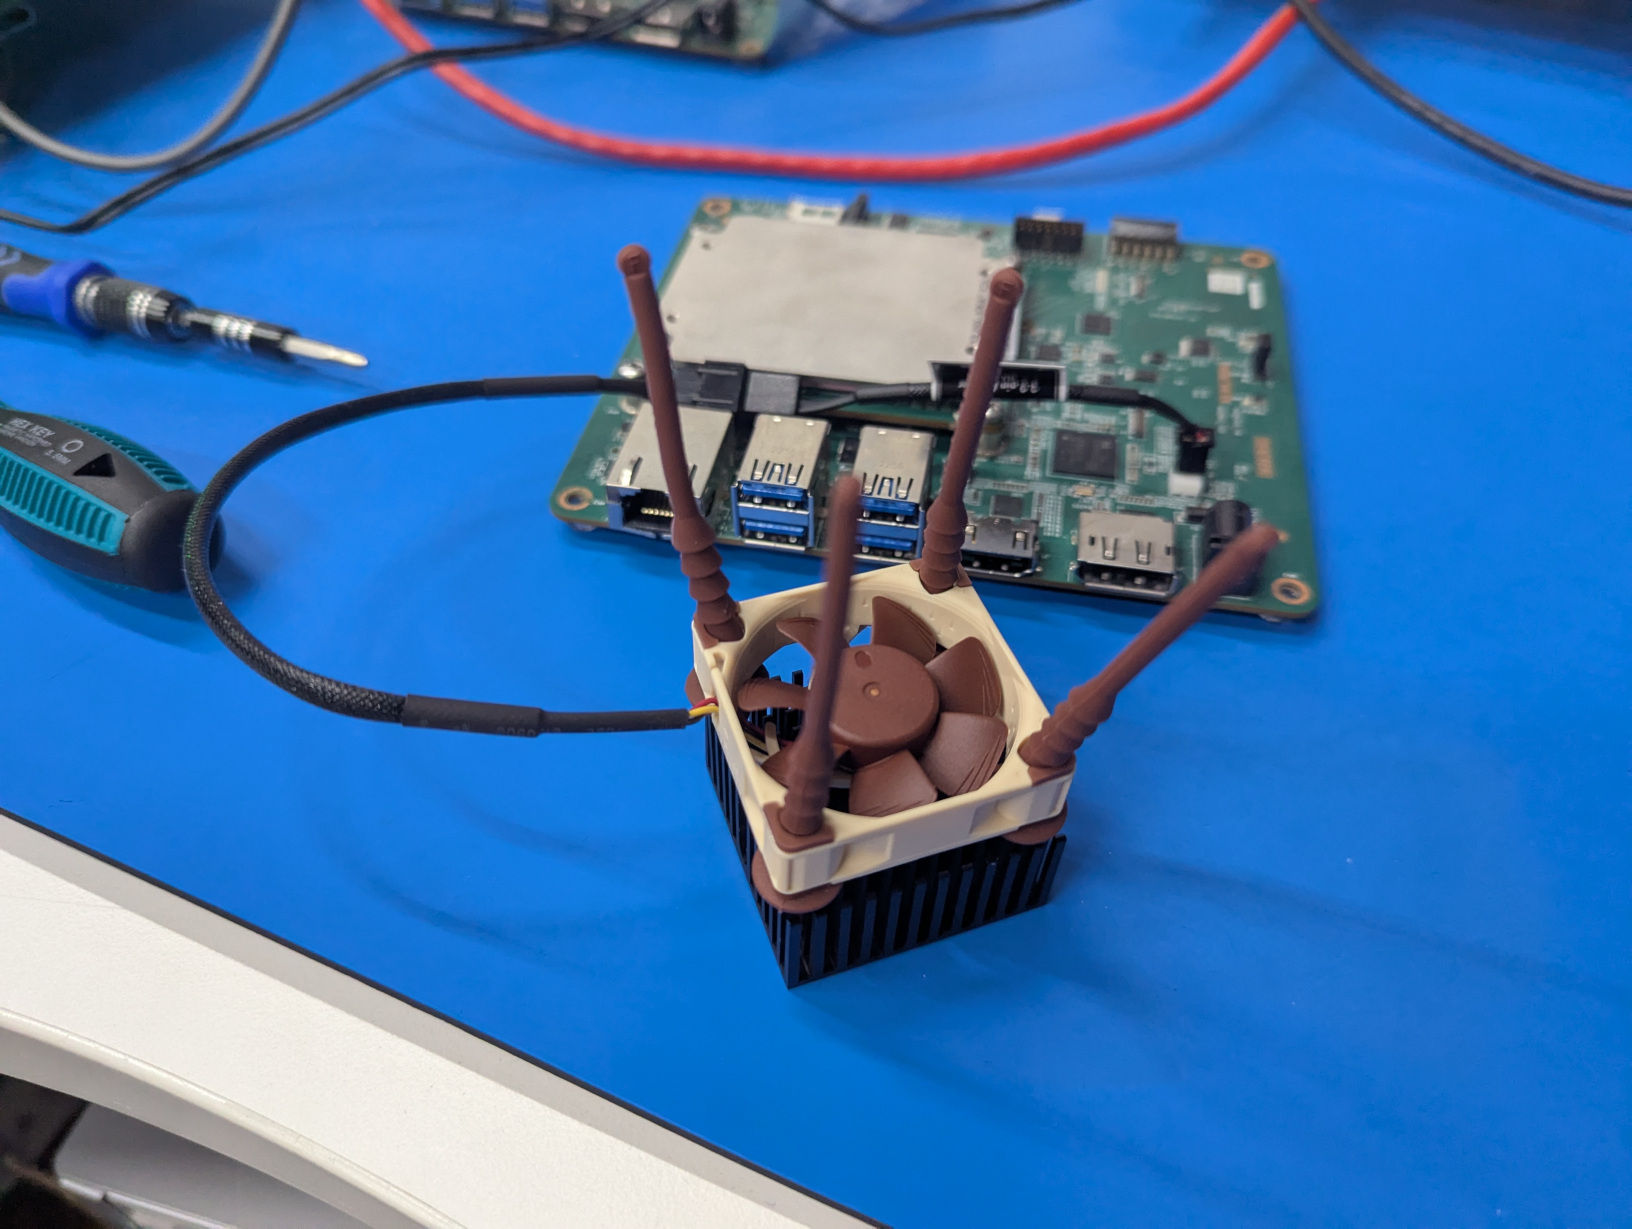
Fan preparation
We want to connect it to the kv260 with the “3:2-pin Adaptor NA-AC2” as shown.
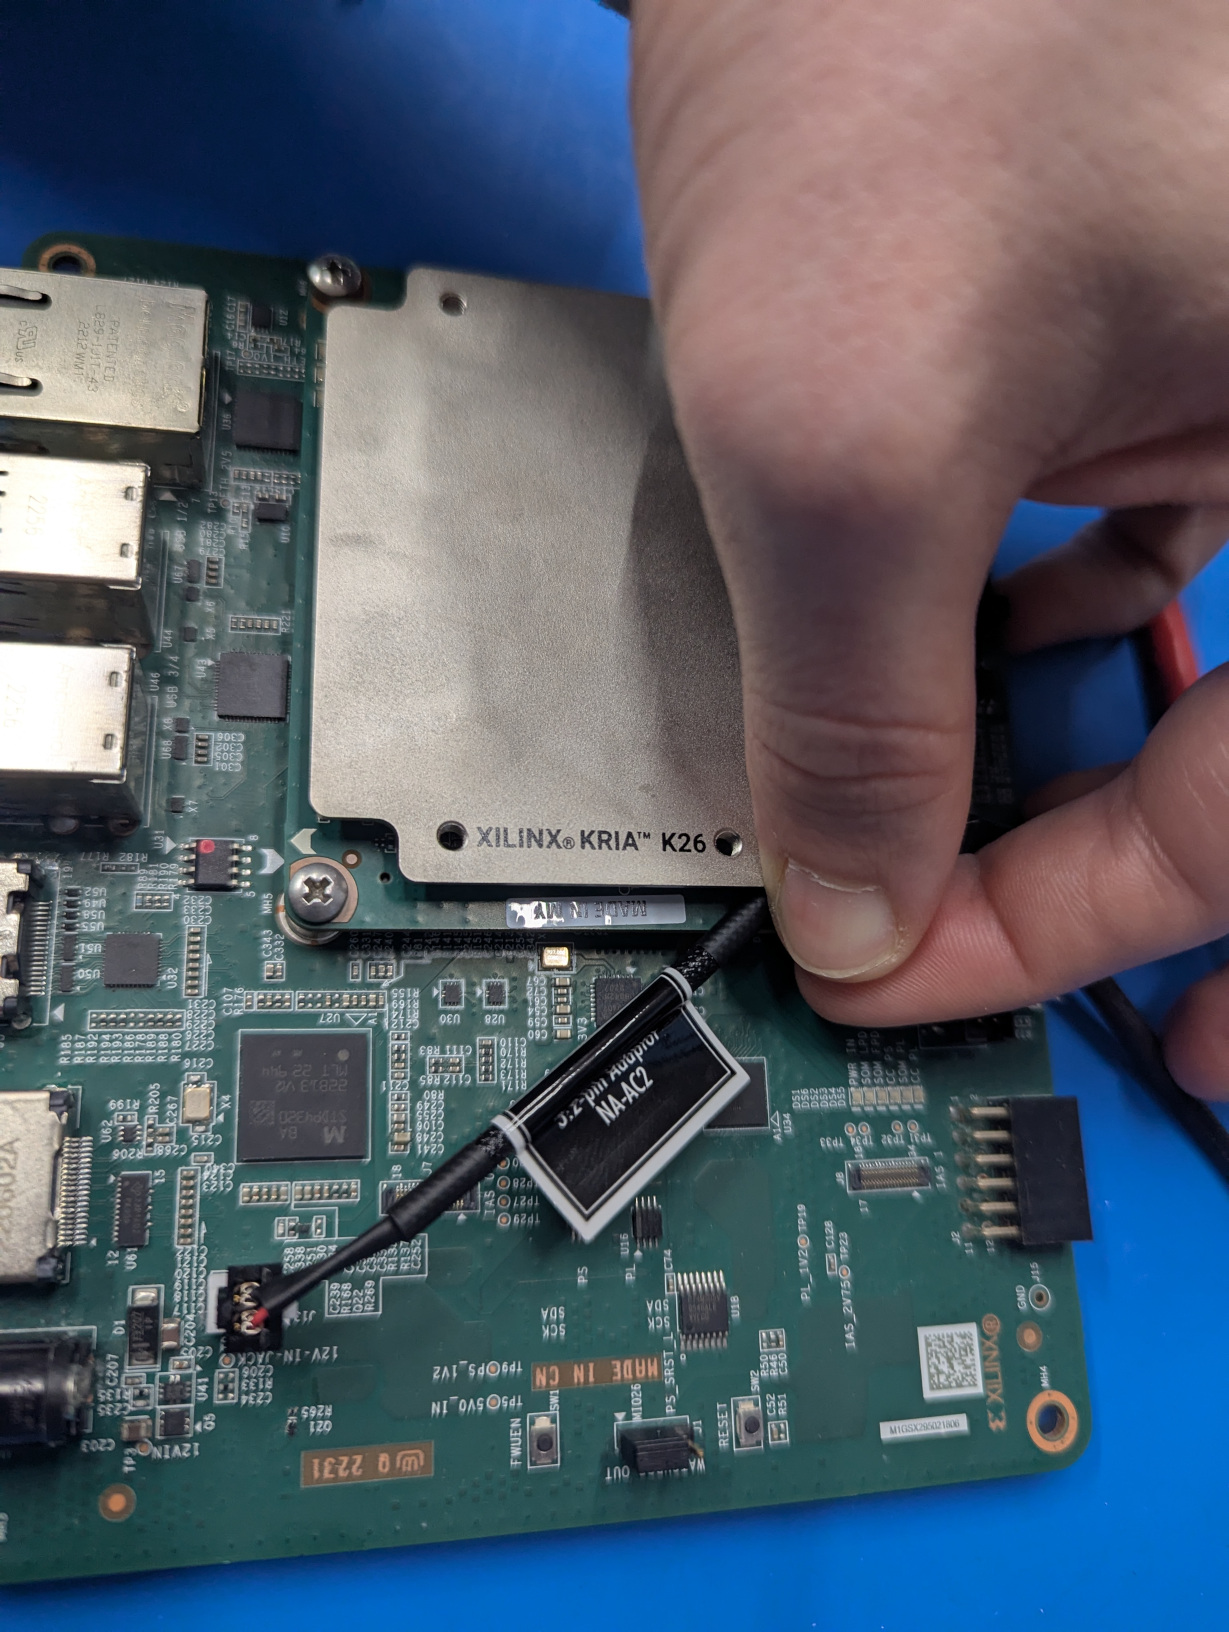
Connect the fan
Red and black wires
Please keep an eye on the red and black wires.
After having placed the heatsink on the kv260 we should end up with this.
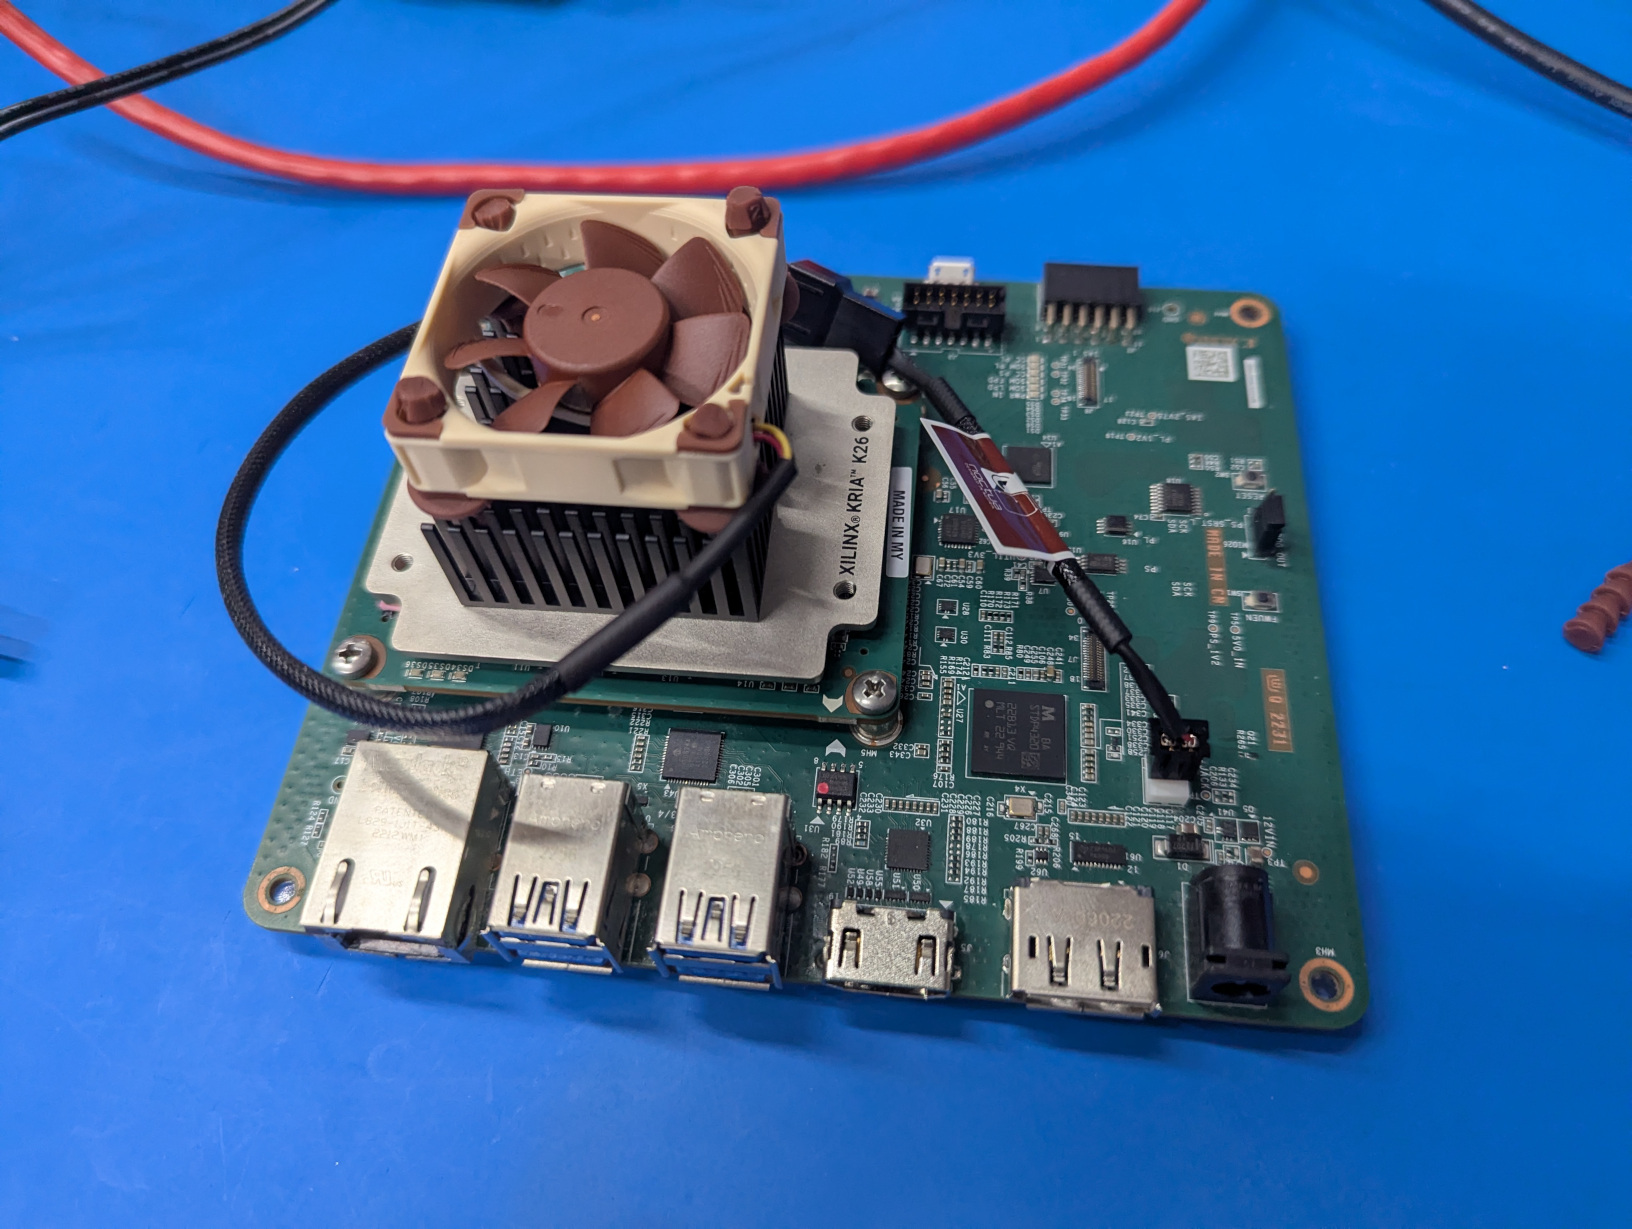
Connect the fan
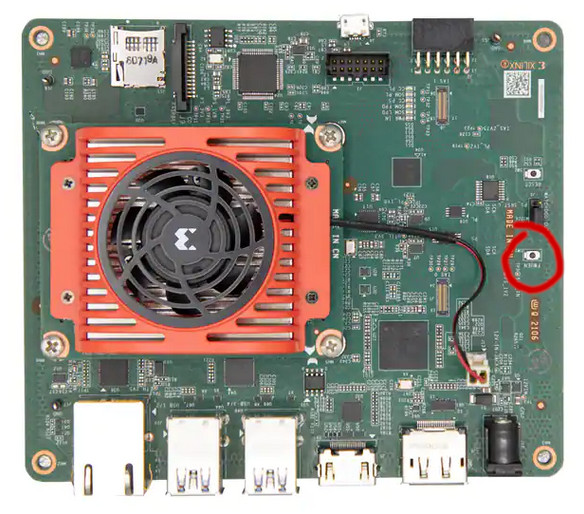
We can proceed in soldering the wires on the FWUEN button.
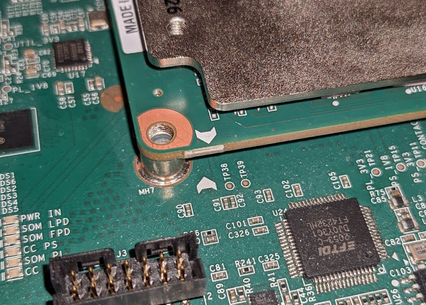
FWUEN Button Soldering
We want to add two wires on the FWUEN button pads to “bypass” it at will from
the LAA. Let’s remind ourselves where it is.
FWUEN Button
Proceed in soldering two wires on the button.
Delicate procedure
This is a delicate procedure so ensure you have a proper setup with solderer, soldering station with lenses, flux, etc.. for small soldering.
This is what we should end up with:
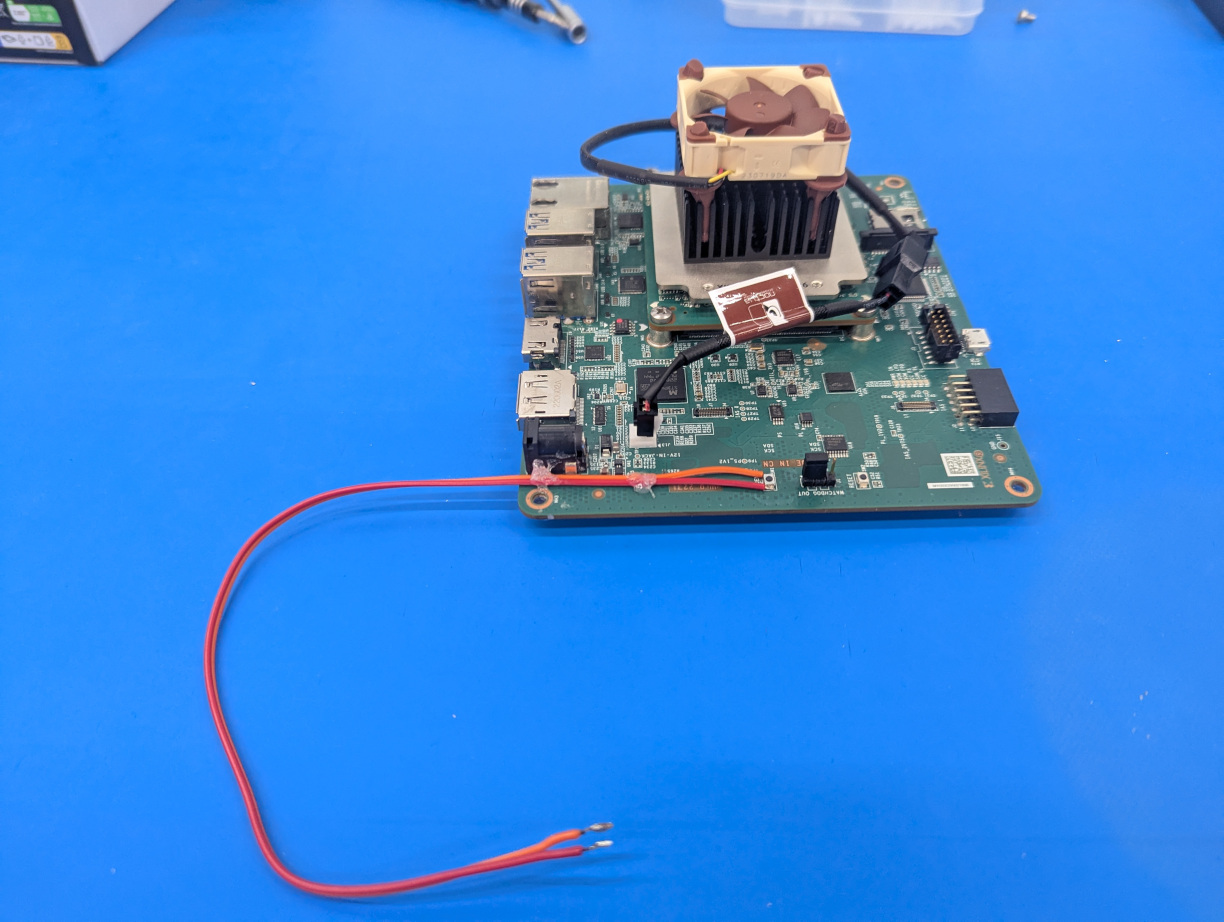
FWUEN Button
Wires length
Keep in mind that the wires need to be connected to the MIB, so do not cut the wires too short.
Glue gun
Use a glue gun to fix the wires on the board.
Flashing the kv260
At this point we can flash the kv260 to properly work with LAVA. Make sure your
shell is good by going through the PC Setup section and setup the appropriate
environmental variables.
Assuming we are in xilinx-lab-stuff/program-flash-kv260, run the write-som
script in the repo. This command will start giving logs and should take from 10
to 20 minutes to finish.
Once
$ ./write-som
At this point, power cycle the kv260 and run a safe test.
$ ./safe-test-kv260
MAKE sure KV260 is powered on an stopped at U-boot
ensure there is only one Xilinx board attached to the PC
Hit enter to continue

# etc...

Verify Operation successful.

Flash Operation Successful
Create a serial connection with the kv260, press the FWUEN button or
short-circuit the FWUEN wires, and power cycle the board. You should get the
following output after booting:
$ sudo tio /dev/serial/by-id/usb-Xilinx_ML_Carrier_Card_XFL1LJHON31V-if01-port0

# etc...

MultiBootOffset: 0x3C0

# etc...

kria-recovery login:
MultiBootOffset value
This is a good opportunity to test the wires and the correct booting via the
MultiBootOffset output value. We want the following behaviour.
Shorted wires
MultiBootOffset: 0x3C0
Not shorted wires
MultiBootOffset: 0x40
At this point you have the kv260 ready for the LAA. Here you can see how to connect it.